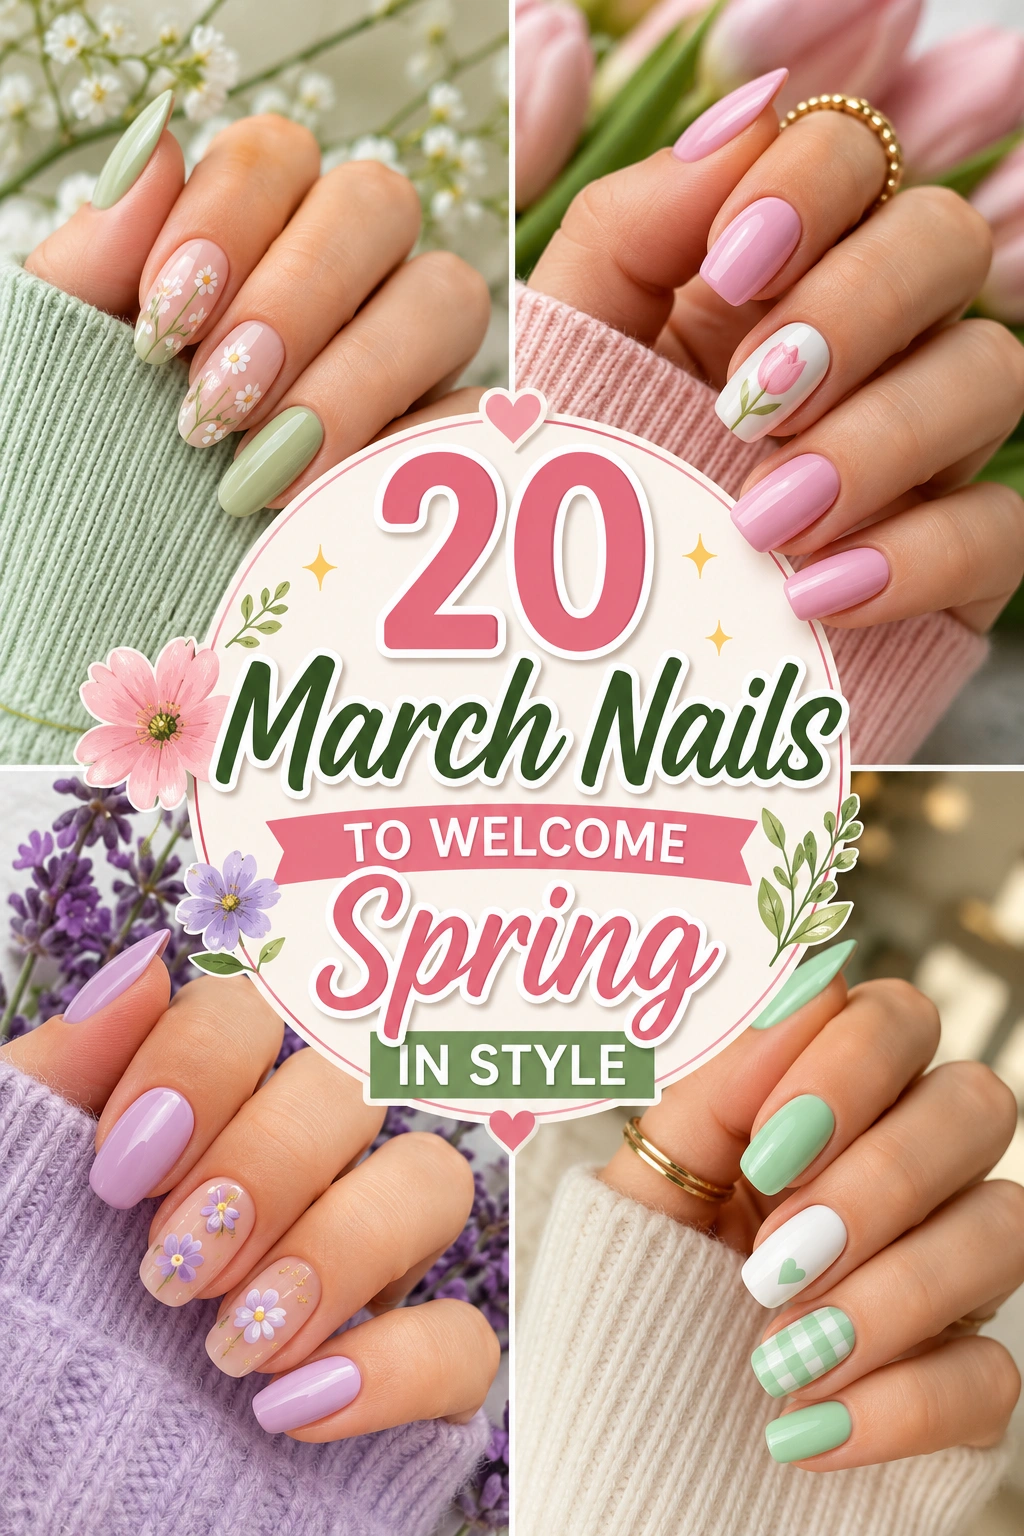
20 March Nails to Welcome Spring in Style
Introduction
Spring is the perfect excuse to refresh your manicure with lighter colors, delicate details, and fresh seasonal inspiration. These march nails bring together everything from pastel French tips and tiny flowers to glossy chrome and playful botanical accents.
Whether you prefer something minimal for everyday wear or a more detailed design for a spring event, there is an idea here to match your style. You’ll find soft pinks, lavender, mint, butter yellow, sky blue, peach, and other cheerful shades that instantly brighten a manicure. I’ve noticed that the most wearable spring designs often combine one simple base with just a few thoughtful details. Save your favorite ideas now and use them as inspiration for your next salon appointment or at-home manicure.
Pastel French Tips
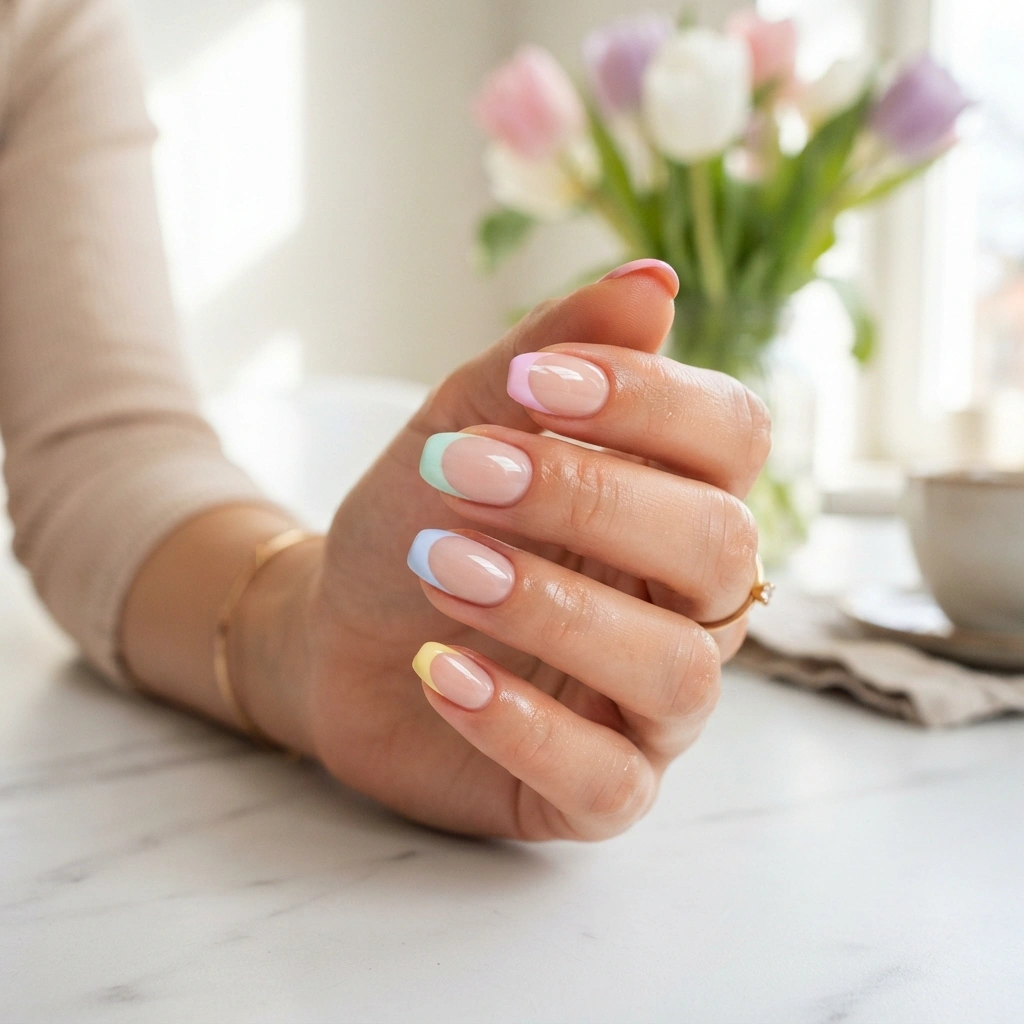
The easiest way to welcome spring is with a softer version of a classic manicure. Pastel French tips keep the familiar shape while introducing gentle color that feels fresh without becoming overwhelming. I’ve noticed this style works especially well when you want something pretty enough for special occasions but practical enough for everyday wear. Try pairing blush pink with lavender, mint, or baby blue across different nails. Keeping the base transparent or milky helps the colors stand out while maintaining a clean appearance, making this design especially easy to coordinate with spring clothing and accessories.
A delicate color palette can also make your hands look brighter and more polished. Instead of matching every tip exactly, alternate complementary pastel shades for a subtle playful effect. Thin tips create a refined result, while slightly thicker curves give the manicure a more noticeable spring-inspired personality. For a salon appointment, bring several reference shades so your technician can adjust the tones to your skin undertone and preferred finish. At home, use thin nail-art brushes or French-tip guides to improve symmetry. Finish with a glossy topcoat to smooth the surface and give the colors that fresh, glassy appearance.
Cherry Blossom Details
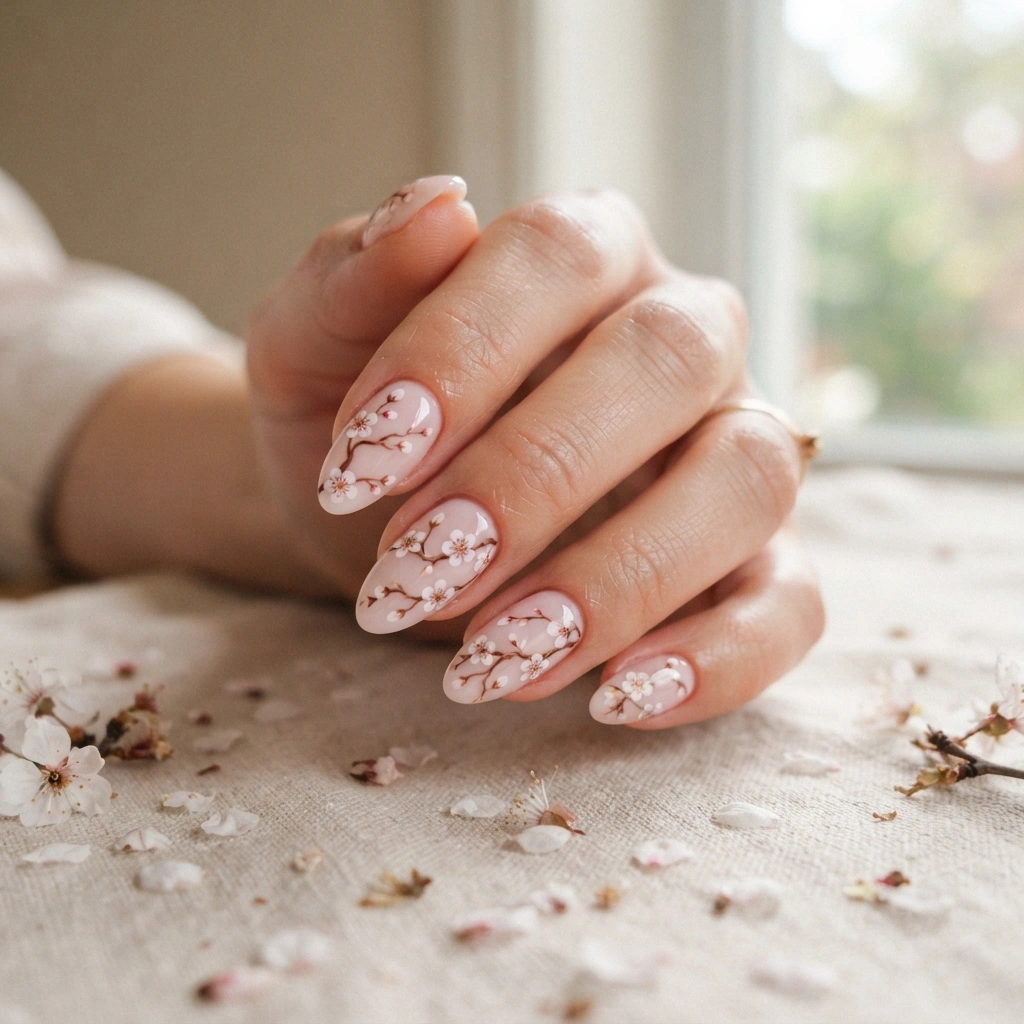
Nothing says early spring quite like delicate blossoms appearing across a soft, milky manicure. Cherry blossom details bring that seasonal feeling to your fingertips without making the design look overly decorative. A translucent pink or creamy base works beautifully because it allows the tiny flowers to remain the focal point. I’ve seen this style look especially elegant when the artwork is limited to two or three accent nails. Keep the remaining nails simple and glossy so the floral details have enough visual space to stand out and create a balanced, sophisticated finish.
Small details make this design surprisingly versatile for everyday wear. White petals paired with thin brown branches create a natural contrast, while tiny touches of pink can make the artwork feel softer. If you prefer a modern look, place blossoms near the cuticle rather than covering the entire nail. A fine liner brush helps create delicate branches, while a dotting tool makes evenly sized petals easier. For salon appointments, ask for varied blossom placement instead of identical patterns. That slight variation gives the manicure a more natural appearance and keeps each nail visually interesting without sacrificing its clean overall look.
Buttercup Yellow Tips
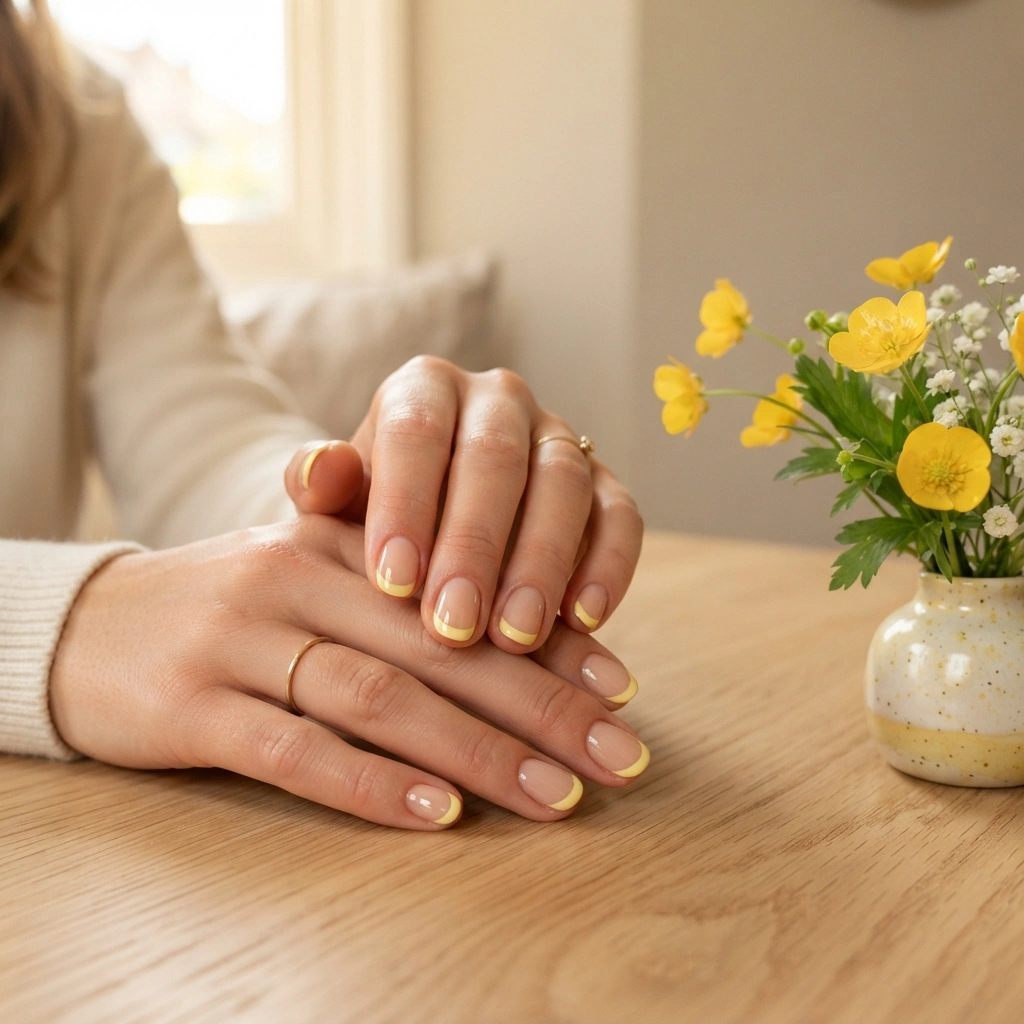
A soft yellow manicure can instantly make a spring look feel brighter while remaining surprisingly sophisticated. Buttercup tips are especially appealing when you want color without committing to a full yellow manicure. Start with a sheer nude or pale pink base, then add curved tips in a creamy yellow shade. The contrast feels cheerful but still understated. In my experience, softer yellow tones are easier to wear across different outfits because they complement denim, white, beige, and floral prints naturally. Keeping the tips thin also creates a cleaner finish that feels polished rather than overly playful.
For an even more dimensional result, consider adding one tiny floral accent or a delicate white dot to each hand. However, the French design should remain the main feature so the manicure does not become visually crowded. If your nails are short, rounded or softly squoval shapes can make the yellow tips look neat and proportionate. Longer almond nails offer more room for dramatic curves. Before applying the color, carefully shape every nail and smooth the edges. A glossy topcoat then brings out the creamy yellow tone and helps the finished manicure look fresh for longer.
Pressed Flower Accents
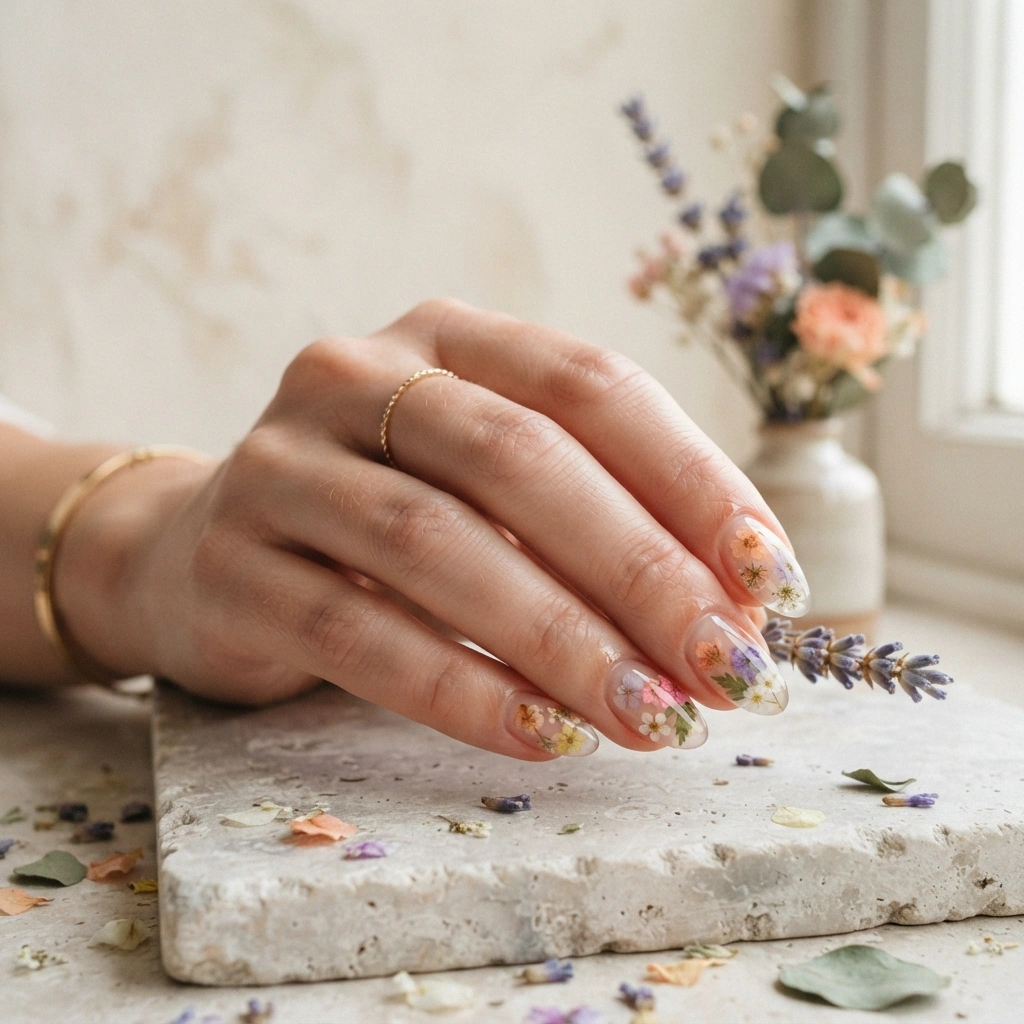
Bring a little botanical charm to your manicure with pressed flower accents that look delicate and naturally arranged. This design works particularly well over a clear, nude, or translucent pink base because the flowers appear almost suspended across the nails. Choose tiny floral shapes in lavender, peach, yellow, and white for a soft seasonal palette. Rather than covering every nail, place botanical details on selected fingers and leave the others glossy. This creates contrast and gives the manicure a more effortless appearance. The result feels feminine, fresh, and detailed without becoming difficult to style.
The beauty of this look is its flexibility. You can use realistic dried-flower elements, hand-painted miniature blooms, or delicate floral stickers depending on your skill level and appointment time. Keep the decorations positioned away from the edges of the nail so they remain protected beneath the topcoat. A clear builder layer can help create a smooth surface when using physical embellishments. For a more artistic effect, vary the flower placement from nail to nail instead of creating identical arrangements. This small change makes the finished set feel personalized while preserving the airy botanical theme associated with spring.
Dainty Daisy Nails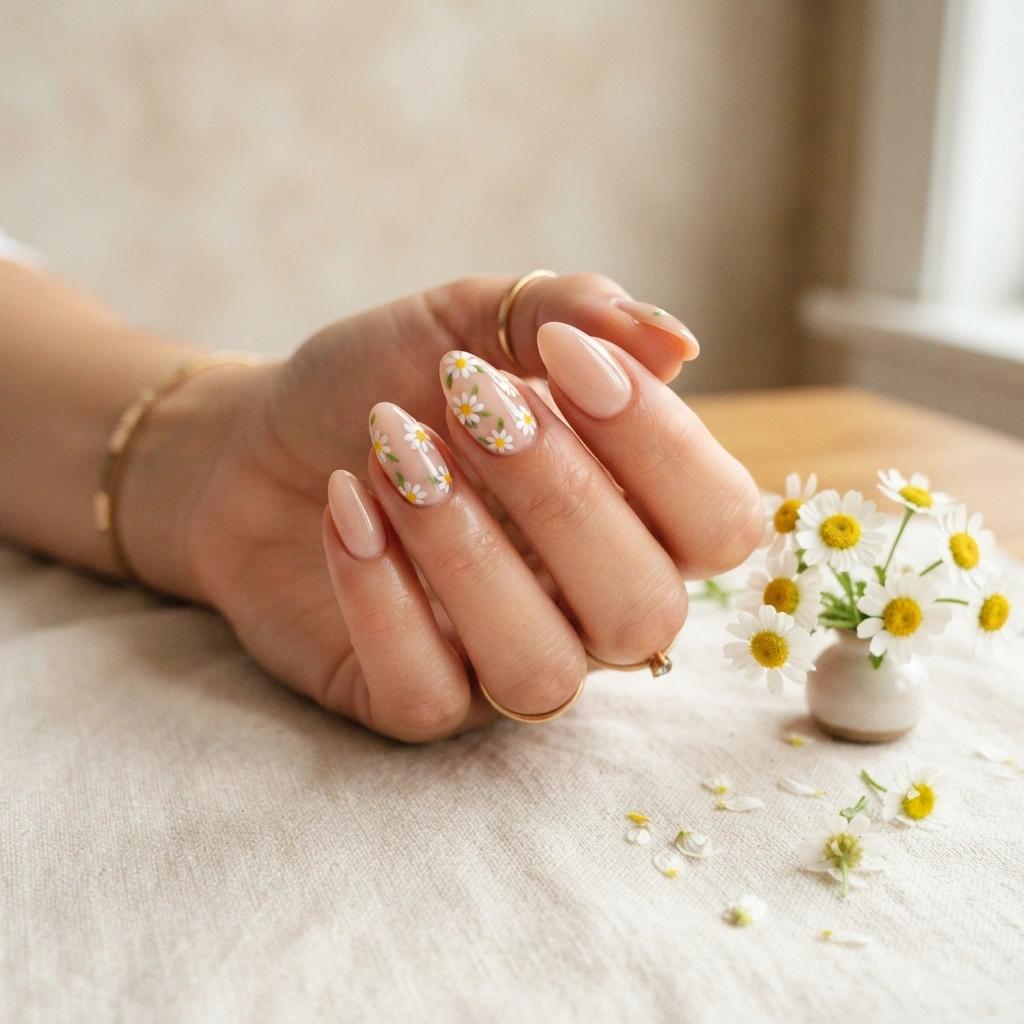
Few floral designs feel as effortlessly cheerful as tiny daisies on a clean nude base. The simple combination of white petals and yellow centers brings spring energy without requiring complicated artwork. I’ve noticed daisy designs look particularly flattering when the flowers vary slightly in size and placement. Instead of covering every nail, use two or three blooms on selected fingers and leave the others minimal. This keeps the manicure visually balanced and makes the floral details feel intentional. A soft pink, beige, or translucent base can also help the white petals appear brighter and more defined.
You can easily adjust this idea to suit your preferred nail length and shape. Short rounded nails look sweet with miniature daisies placed near the cuticle, while longer almond nails provide more space for scattered floral arrangements. For a subtle version, use only one daisy on each hand as an accent. If you want stronger contrast, add tiny green leaves between selected flowers. Keep the artwork crisp rather than overly detailed because the charm comes from its simplicity. A glossy finishing layer will unify the colors and give the entire manicure a fresh, polished appearance.
Lavender Swirl Tips
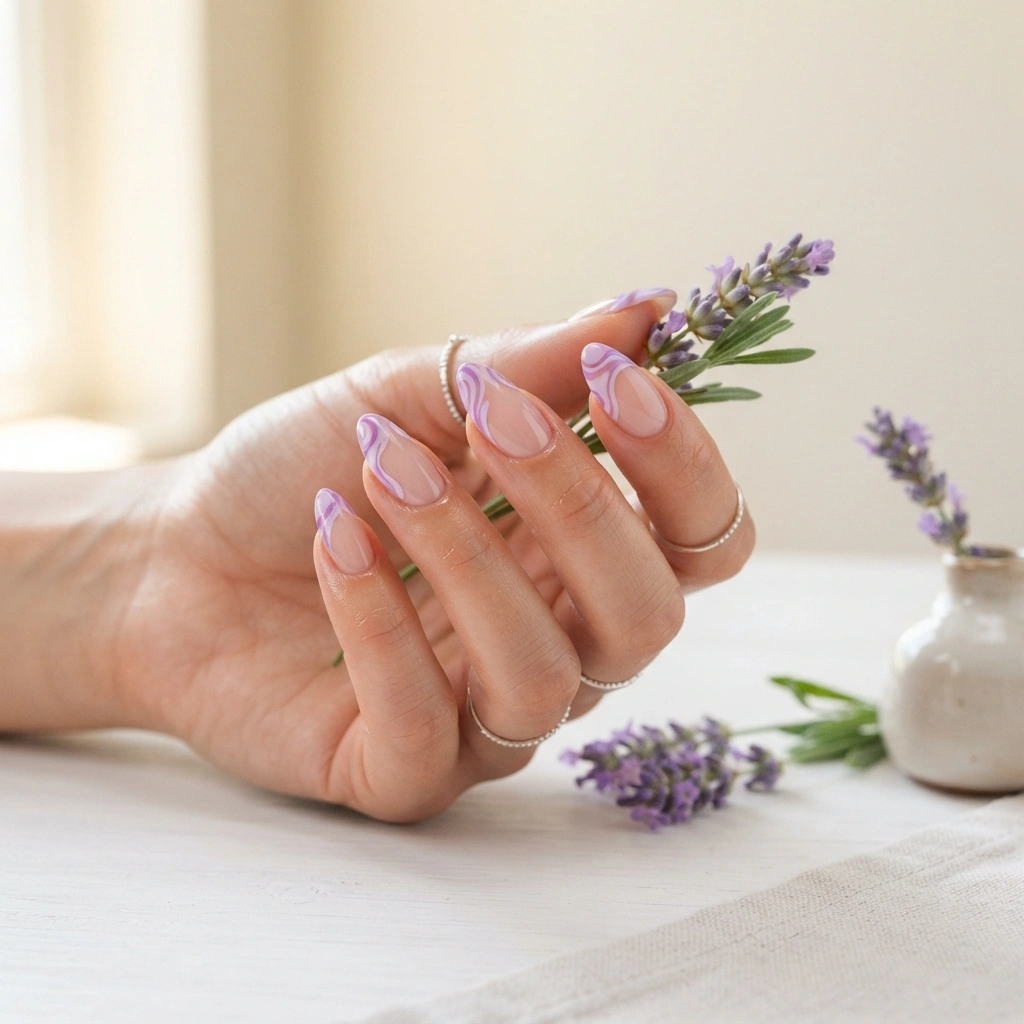
Soft lavender swirls offer a modern way to bring spring color into your manicure without relying on traditional floral artwork. The flowing lines create movement across each nail while maintaining a delicate overall appearance. Start with a translucent pink or milky nude base, then layer two complementary lavender shades in thin curved strokes. The contrast should remain gentle rather than dramatic. In my experience, keeping the lines narrow makes this style easier to wear with different outfits. It also prevents the manicure from looking too busy when several swirls appear on neighboring nails.
The placement of each curve can change the entire personality of the design. Sweep the lines toward one side for an elegant asymmetrical effect, or mirror the curves across each nail for a more structured finish. A glossy surface works especially well because it makes the lavender tones look richer and smoother. If you have shorter nails, concentrate the swirls toward the tip to visually elongate the nail. For longer shapes, extend the curves closer to the cuticle. Finish with a quality topcoat to protect the fine artwork and create a seamless reflective surface.
Green Botanical Lines
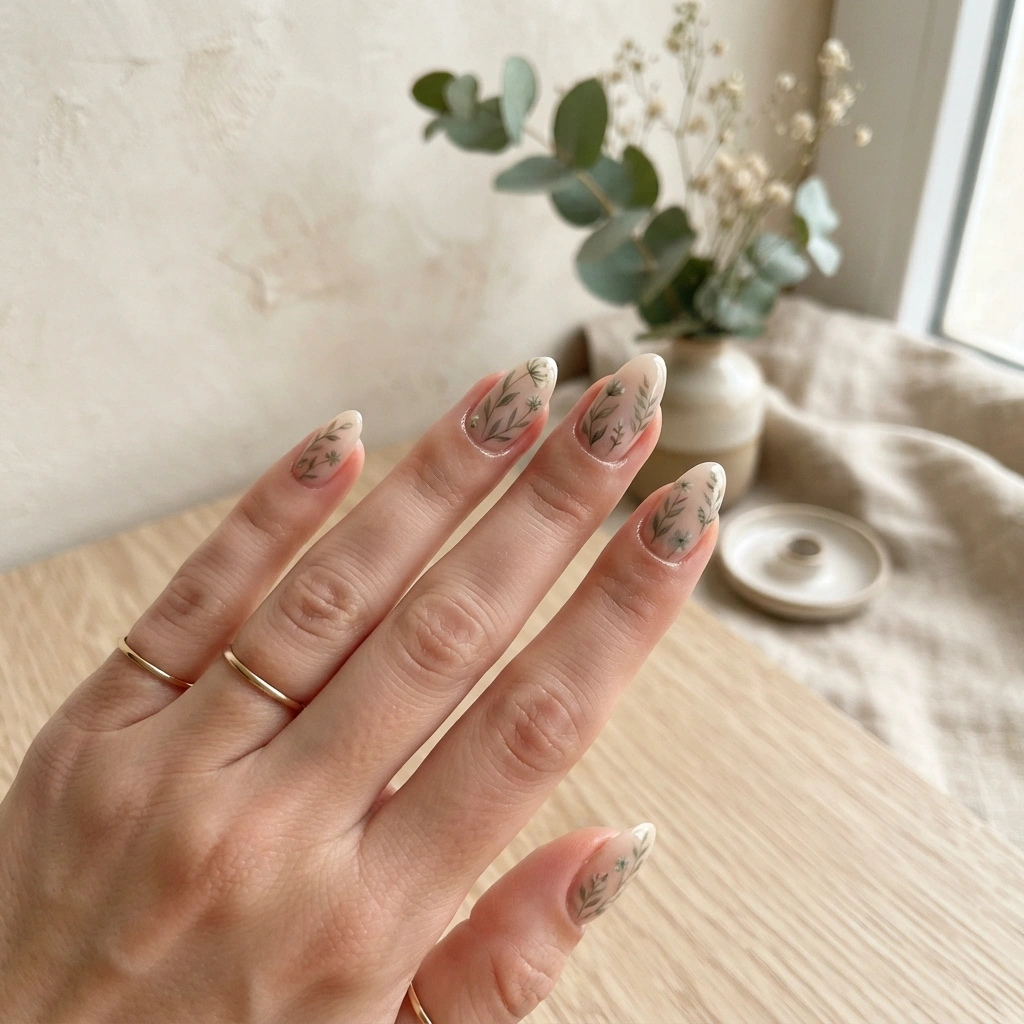
Fresh green details can make a neutral manicure feel instantly connected to spring. Thin botanical stems and tiny leaves create a refined alternative to bold floral artwork, especially when paired with a sheer beige or milky pink base. Sage, olive, and muted eucalyptus tones work particularly well because they feel natural rather than overly bright. I’ve seen this style become more wearable when the botanical artwork is limited to a few nails. Leaving plenty of negative space allows the green details to breathe and keeps the overall manicure polished enough for everyday settings.
For the most natural-looking result, avoid making every stem perfectly identical. Slight differences in length, direction, and leaf placement can make the artwork feel more organic. A very fine liner brush is ideal for creating delicate stems, while a small dotting tool can help form tiny leaves. If you are working with short nails, keep the botanical elements close to the center so they remain visible. Longer nails allow more elaborate branches. Seal everything with a clear glossy coat, or choose a satin finish if you prefer a softer, modern botanical appearance.
Peachy Ombre Nails
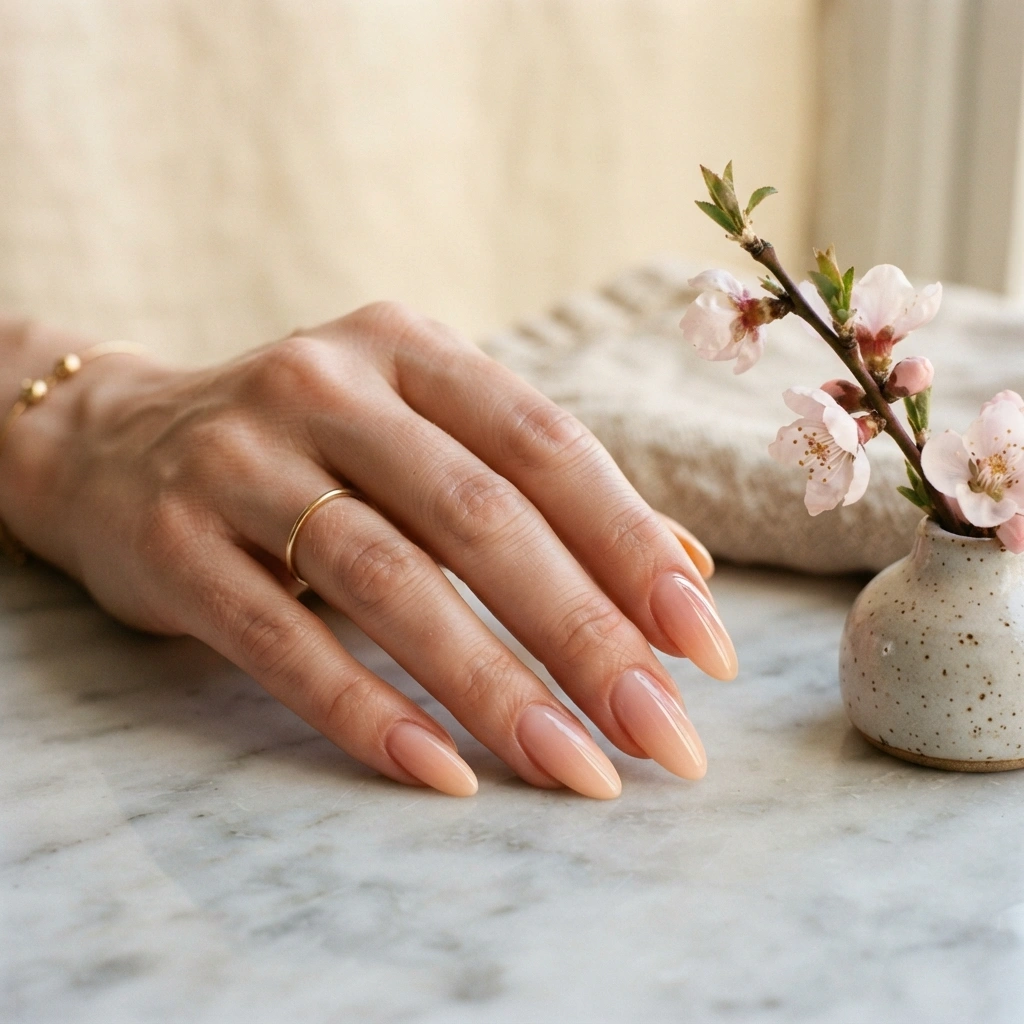
Warm peach tones bring a subtle glow to spring manicures while keeping the overall look soft and sophisticated. A peachy ombre works beautifully when the color gradually fades into a translucent blush or nude base. The seamless transition creates a clean appearance that can easily move from casual daytime outfits to more polished occasions. I’ve noticed that slightly muted peach shades tend to look especially elegant because they add warmth without overwhelming the hands. For a fresh seasonal effect, choose creamy tones instead of highly saturated orange, then finish with a smooth glossy layer.
The gradient can be adjusted depending on your nail shape and preferred intensity. Longer almond nails give the ombre more space to develop, while shorter nails can benefit from a concentrated peach tip that creates subtle length visually. Ask your nail technician for a diffused transition rather than a hard color boundary. At home, a makeup sponge can help blend thin layers of polish, although gel techniques may require more specialized application. Keep the rest of the design minimal so the color transition remains the star. A glossy finish will make the peach appear brighter and more dimensional.
Tiny Tulip Art
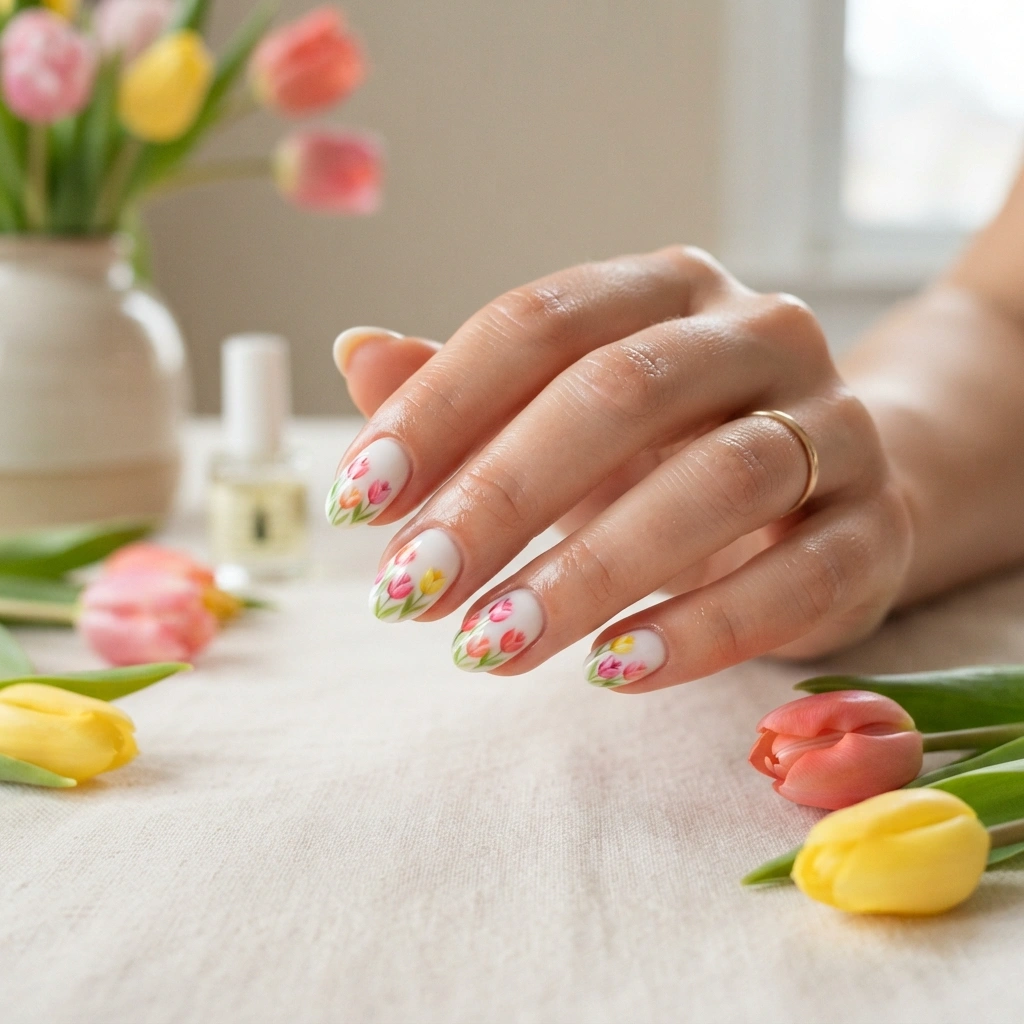
Tiny tulips add a cheerful seasonal touch while keeping the manicure delicate and easy to wear. Their recognizable shape makes even a small amount of artwork feel intentional, especially when paired with a milky white or translucent nude base. Try pink, coral, yellow, or soft purple flowers for a palette that feels naturally inspired by spring gardens. Instead of placing a tulip on every nail, use two or three accent fingers and keep the remaining nails glossy. This creates breathing room and helps the miniature artwork remain visible without making the overall manicure feel crowded.
For a more polished result, vary the direction and height of the tulip stems so the flowers appear naturally arranged. A fine detailing brush can create thin green stems, while small curved strokes form the flower heads. If detailed painting feels difficult, floral decals can achieve a similar effect with less effort. Short nails look particularly charming with tiny tulips positioned near the center, while longer nails can support small bouquets. Finish with a protective topcoat to smooth the artwork and enhance the contrast between the crisp floral colors and the soft background.
Pink Chrome Shine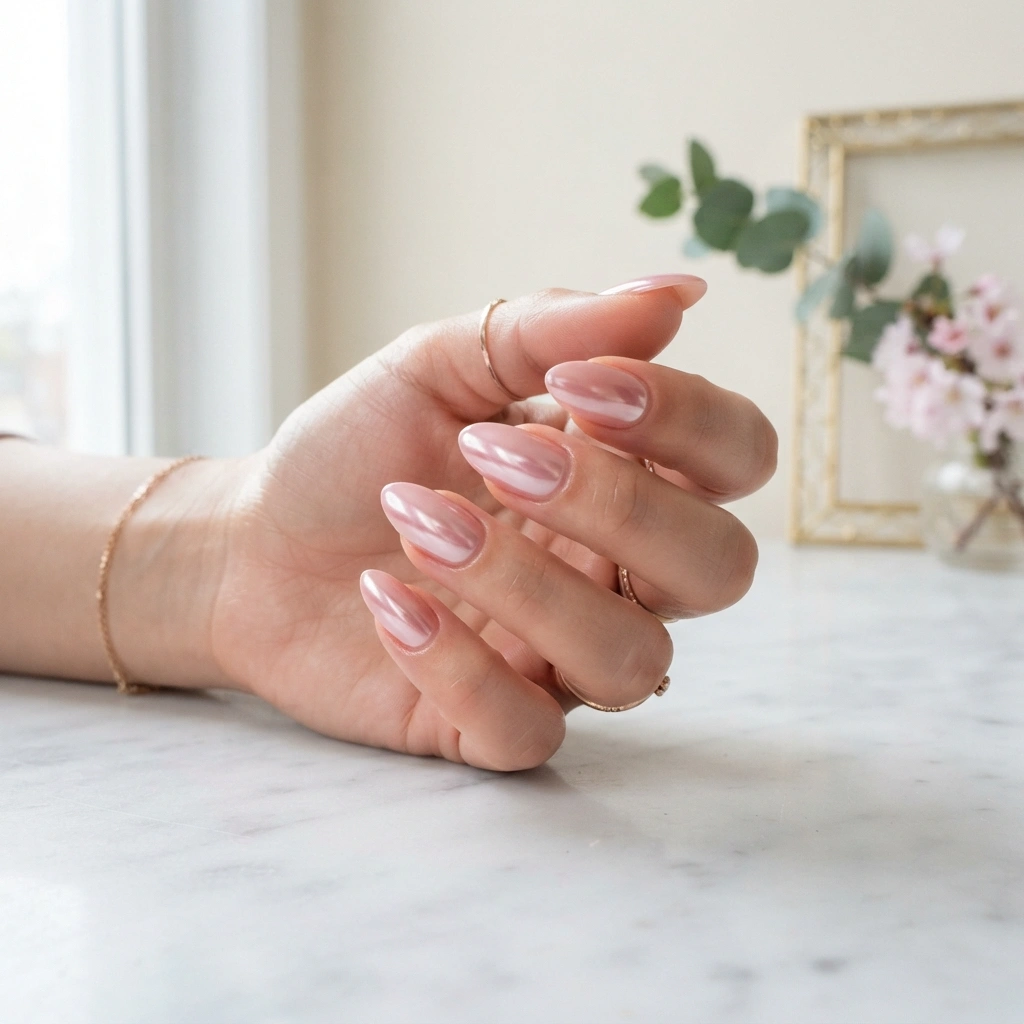
A soft pink chrome finish gives a classic spring color a sleek, modern update. Instead of adding multiple decorative elements, the reflective surface becomes the main attraction. Begin with a translucent blush or pale pink base, then apply a fine chrome powder to create an even metallic glow. The result changes subtly under different lighting, making the manicure look polished without relying on complicated artwork. I’ve noticed this style photographs particularly well in natural daylight because the soft reflection highlights the nail shape while keeping the color feminine and understated.
The intensity of the chrome can be customized to match your personal style. A light application creates a pearly shimmer, while additional layers produce a stronger mirror-like effect. Almond and oval shapes work especially well because their curves catch the light from multiple angles. Keep the cuticle area neat and the surface perfectly smooth before applying chrome, as imperfections can become more noticeable after polishing. Once the desired shine is achieved, seal the manicure carefully around the edges. This helps preserve the reflective finish and gives the final look a clean, luxurious appearance.
Blue Floral Tips
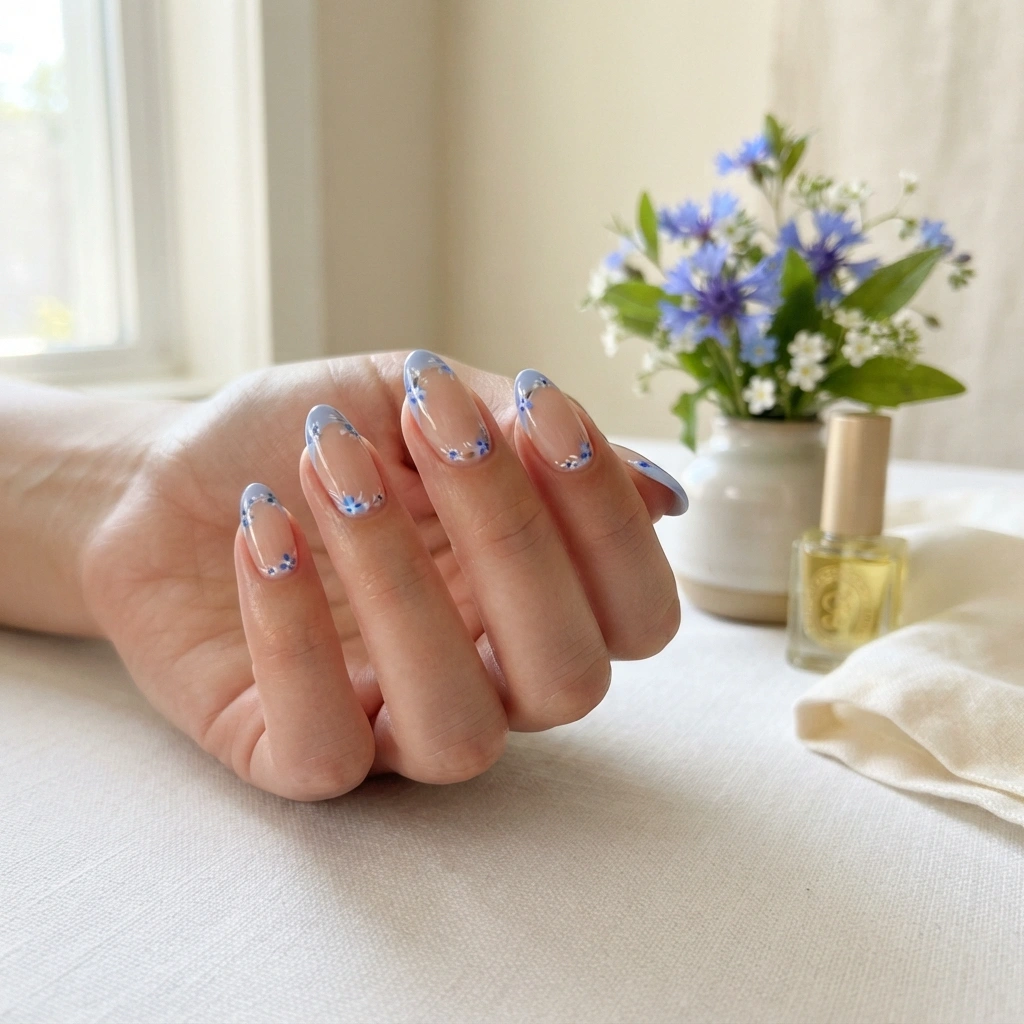
A fresh blue manicure can feel surprisingly springlike when the color is softened with delicate floral details. Instead of creating traditional French tips, shape the blue color into tiny petals and curved accents along the nail edge. A sheer nude or milky base keeps the design light and allows the artwork to remain the focal point. Soft cornflower, sky blue, or muted periwinkle shades work especially well. I’ve noticed floral French designs look more balanced when the flowers are concentrated toward the tips rather than scattered across the entire nail.
This design is easy to customize according to nail length and shape. On shorter nails, use miniature flowers with very thin outlines so the details remain visible without taking up too much space. Longer almond nails allow larger floral arrangements and slightly more dramatic curves. For a coordinated look, use one solid blue accent nail while keeping the others floral. A glossy topcoat will smooth the artwork and make the blue tones appear brighter. If you prefer a softer finish, a satin topcoat can reduce reflection while preserving the clean botanical-inspired appearance.
Strawberry Accent Nails
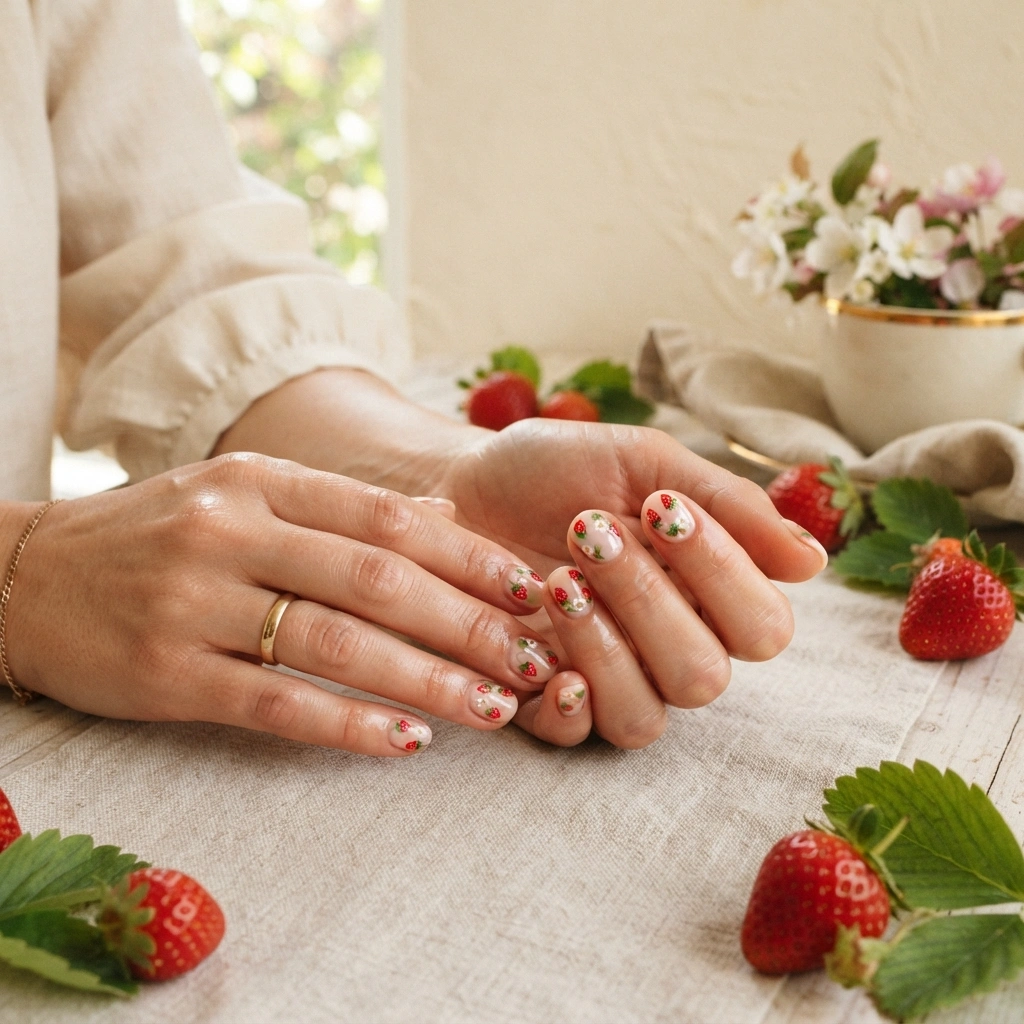
Playful fruit-inspired artwork can make a spring manicure feel cheerful without requiring a complicated full set. Tiny strawberries look especially charming against creamy pink, nude, or milky white bases. The design becomes more polished when the berries are small and spaced across only a few accent nails. Use soft red or berry tones instead of extremely bright colors if you want a more wearable finish. Small green leaves provide enough contrast to make the fruit recognizable. This combination works beautifully for casual outfits, weekend plans, and anyone who enjoys a little personality in their manicure.
The amount of detail can be adjusted to suit your preferred style. A minimalist version might use one tiny strawberry on each accent nail, while a more playful set can feature scattered berries in different sizes. Short rounded nails provide a cute canvas for miniature artwork, while almond shapes create more space for delicate stems and leaves. If hand painting feels challenging, small decals can simplify the process considerably. Seal the artwork beneath a glossy topcoat to create a smooth finish and protect the tiny details from everyday friction.
Dewy Watercolor Florals
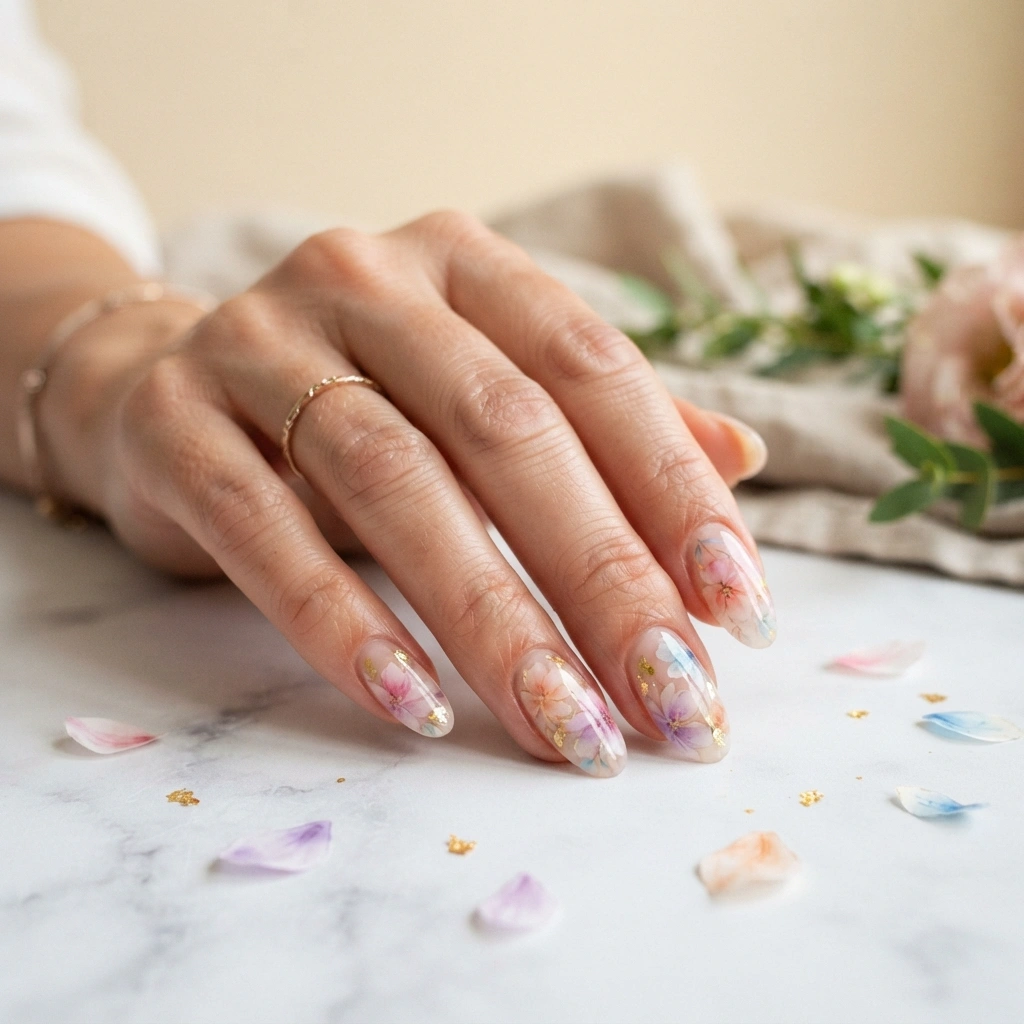
Soft watercolor flowers bring an artistic quality to spring manicures while keeping the color palette light and romantic. Instead of using solid blocks of polish, translucent layers create petals that appear gently blended together. Combine blush pink, lavender, peach, and pale blue for a subtle garden-inspired palette. A milky or clear base works particularly well because it allows the colors to remain luminous. I’ve seen watercolor designs look most sophisticated when the artwork is intentionally imperfect, with petals varying slightly in transparency and shape rather than appearing mechanically identical.
This technique can also make a detailed manicure feel surprisingly delicate. Begin with very thin color layers and allow each section to blend naturally before adding additional definition. A fine brush can create faint outlines or tiny centers without overpowering the translucent petals. Keep some areas completely bare to create visual breathing room between flowers. Longer oval or almond nails provide enough space for larger compositions, while shorter nails benefit from one or two miniature blooms. Finish with a glossy topcoat to intensify the transparent color layers and create a smooth, glassy surface.
Mint Green French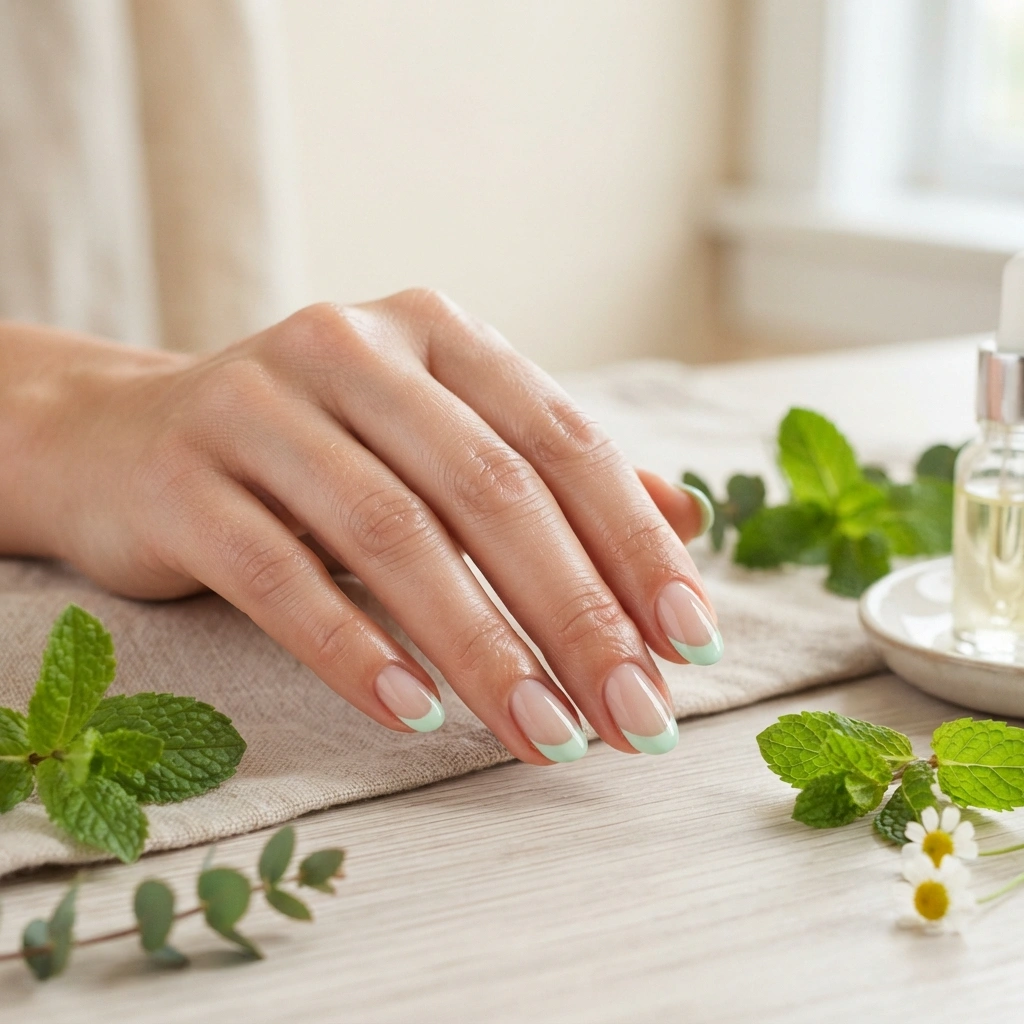
Mint green brings a refreshing touch to a spring manicure while remaining soft enough for everyday styling. Instead of covering the entire nail, use the color only along the tips for a clean French-inspired design. A translucent nude or milky pink base creates a gentle contrast that allows the mint shade to stand out without looking too intense. I’ve noticed pastel green works particularly well with simple nail shapes because the color itself provides enough visual interest. Pair it with neutral clothing, white accessories, or soft floral prints for an effortless seasonal combination.
You can make the design more distinctive by varying the tip shape slightly across your nails. Thin curved tips create a minimalist appearance, while thicker tips make the mint color more noticeable. Almond and squoval shapes both complement this style, depending on whether you prefer something elegant or practical. For a subtle twist, add one tiny white flower or a single metallic accent nail. Keep additional decoration minimal so the fresh green remains the main feature. Finish with a glossy topcoat to protect the tips and create a smooth, polished surface that catches natural light beautifully.
Pearl Pink Shimmer
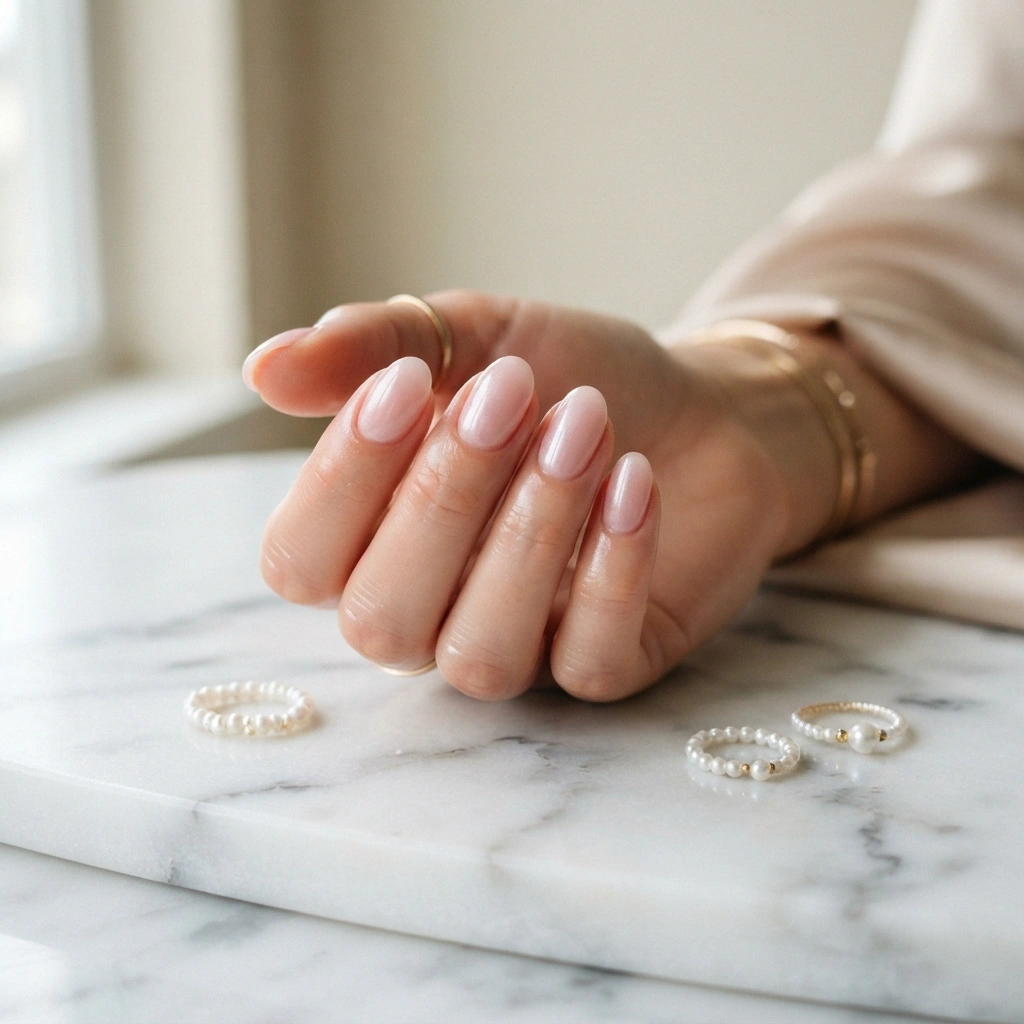
A subtle pearl shimmer can transform a simple pink manicure into something that feels polished and luminous. Rather than using chunky glitter, choose an ultra-fine pearlescent finish that catches the light gently across the surface. Blush, ballet pink, and translucent rose tones all work beautifully with this technique. The result feels elegant enough for celebrations but understated enough for everyday wear. In my experience, pearl finishes are especially flattering when the nail shape is neatly filed because the smooth reflection emphasizes clean edges and makes the entire manicure appear more refined.
The amount of shimmer can be adjusted depending on how noticeable you want the final effect to be. One light layer creates a barely-there glow, while additional coats provide stronger pearlescent reflection. Oval, almond, and softly rounded shapes all pair naturally with this finish. Keep the surrounding design simple so the light-catching surface remains the main feature. Before applying the shimmer, smooth the nail thoroughly because fine reflective particles can highlight uneven areas. A glossy topcoat will seal the finish and create the smooth, glasslike surface that makes pearl pink look especially sophisticated.
Butterfly Accent Art
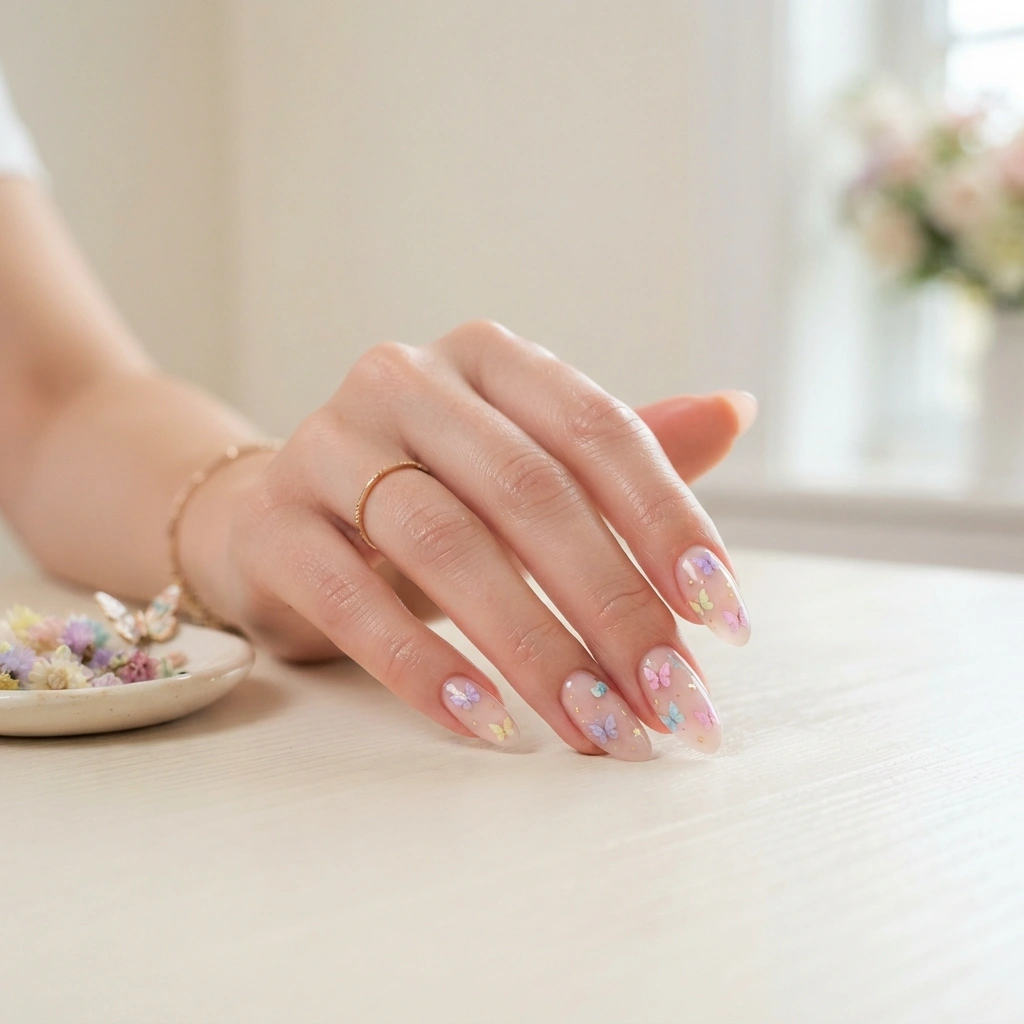
Butterfly details add a lighthearted spring touch while giving a manicure a sense of movement. Tiny butterflies look especially delicate when painted in pastel lavender, blush pink, pale blue, or soft yellow. A translucent base keeps the design airy, while small accents on two or three nails prevent the artwork from becoming overwhelming. I’ve noticed that slightly different butterfly sizes make the finished manicure feel more natural than repeating one identical shape. Keep the wings delicate and avoid filling too much of the nail surface so the design maintains its graceful, floating appearance.
For a more sophisticated interpretation, use only one butterfly on each hand and combine it with simple glossy nails. A tiny shimmer layer underneath can make the wings catch the light without adding bulky decoration. Almond and oval shapes provide plenty of room for detailed wing patterns, while short nails work best with miniature silhouettes. If hand painting is difficult, thin decals can create clean shapes quickly. Seal the butterflies carefully with a clear topcoat to protect the artwork and maintain a smooth surface. The finished look feels playful, feminine, and perfectly suited to the lighter mood of spring.
Coral Flower Details
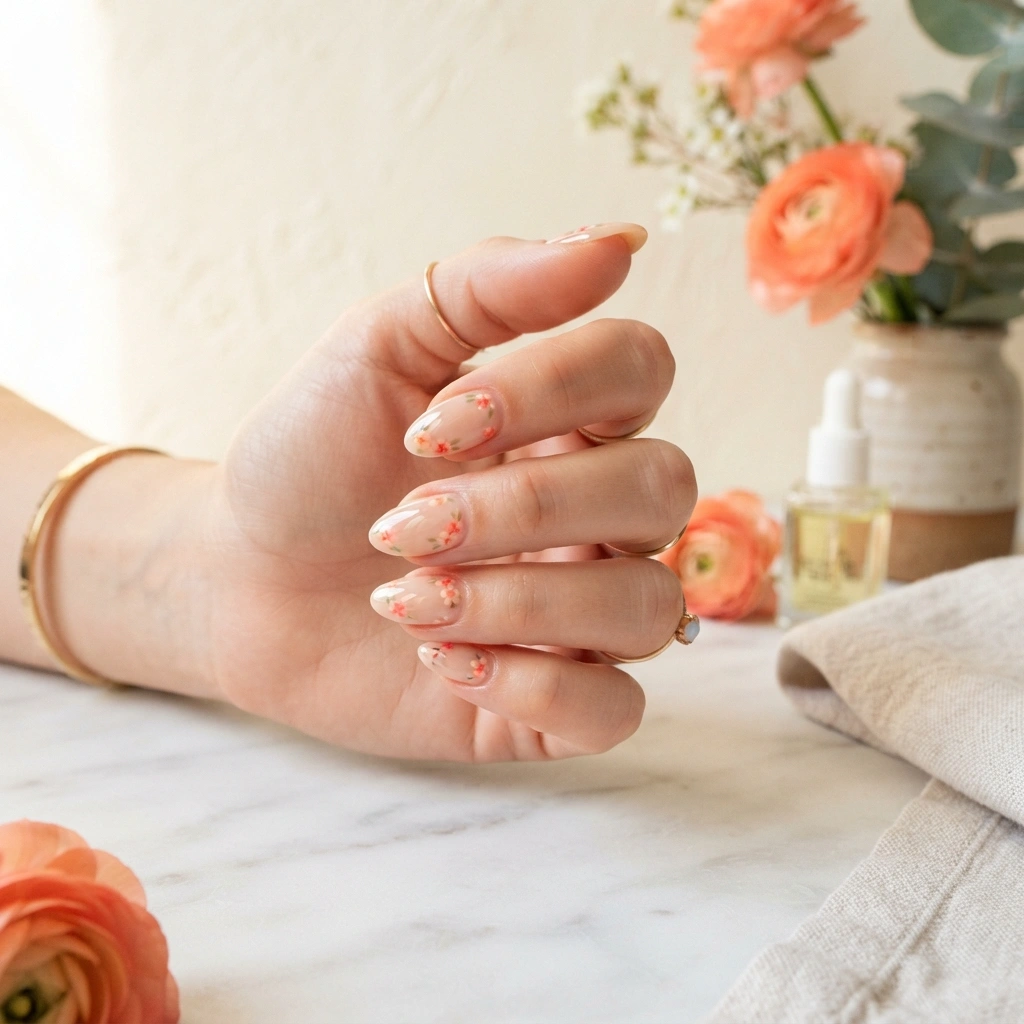
Coral flowers bring a cheerful warmth to spring nails without feeling as bold as a full orange manicure. The shade sits beautifully between pink and peach, making it easy to pair with neutral clothing and colorful seasonal outfits. Use a sheer nude or soft peach base, then add tiny coral blossoms to selected nails. I’ve noticed this combination looks especially polished when the flowers are kept small and surrounded by plenty of negative space. The result feels fresh and feminine while remaining versatile enough for workdays, brunches, celebrations, and everyday spring styling.
You can create more dimension by combining two coral shades within the floral artwork. Use a lighter tone for the petals and a slightly deeper shade for the centers or outlines. A few tiny green leaves can provide contrast without changing the soft character of the manicure. For shorter nails, position the flowers near one side to avoid making the nail appear crowded. Longer almond shapes allow small floral clusters or curved stems. Finish with a glossy topcoat to smooth the artwork and bring out the warm coral tones, giving the final set a clean, salon-finished appearance.
Rainbow Pastel Lines
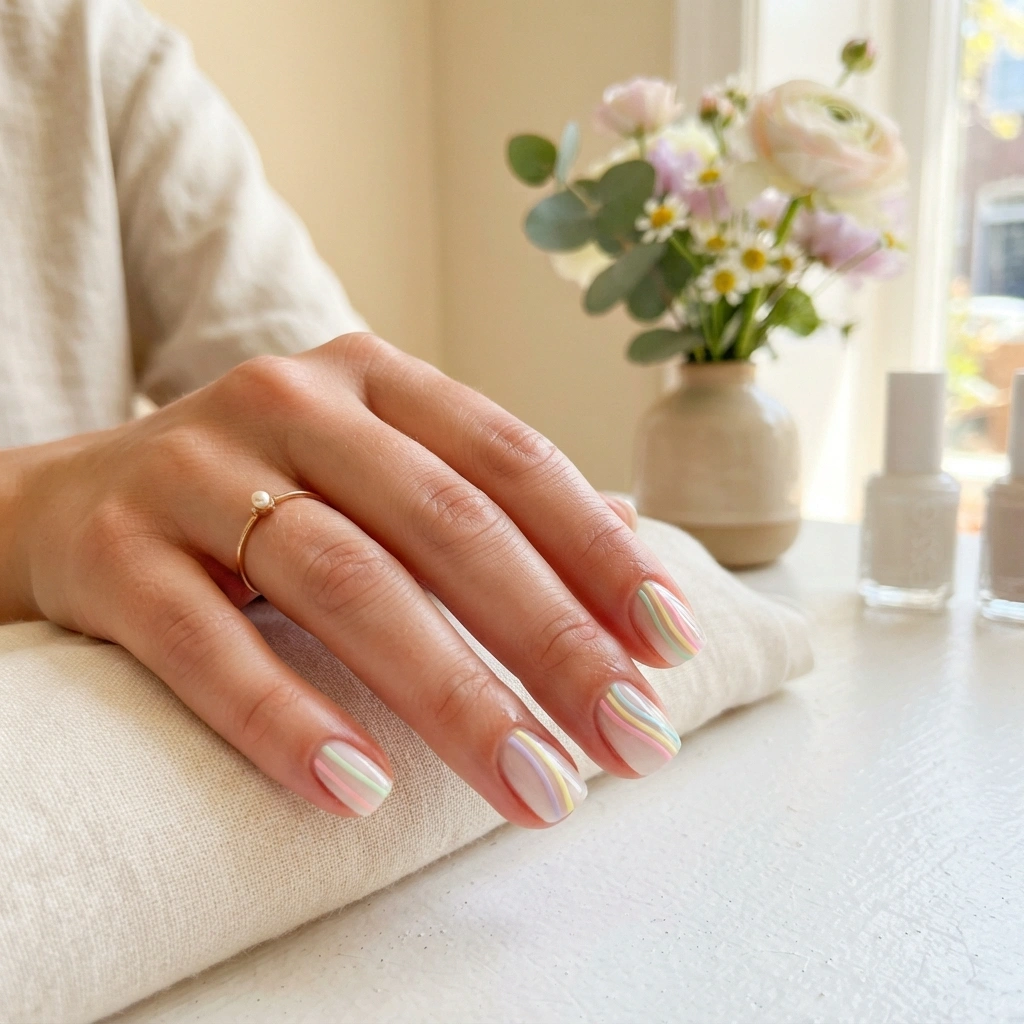
A pastel rainbow manicure can introduce several spring colors while still looking clean and sophisticated. Instead of painting full rainbow arches, use thin curved lines in pink, yellow, mint, lavender, and baby blue. The narrow strokes create a colorful detail without covering the entire nail. A milky white or translucent base helps each shade remain visible and gives the manicure a fresh appearance. In my experience, using muted pastel tones rather than highly saturated colors makes multicolor designs much easier to coordinate with everyday clothing and accessories.
The line placement can be customized to make the manicure feel more modern. Try diagonal curves on one nail, vertical arcs on another, and tiny rainbow strokes near the tips elsewhere. This variation keeps the set visually interesting while maintaining the same color story. Short squoval nails are ideal for minimal rainbow details, while almond nails allow longer sweeping curves. Keep the lines fine and evenly spaced for a polished result. Finish with a glossy topcoat to unify the different colors and create a smooth reflective surface that enhances the delicate pastel palette.
Lemon Blossom Tips
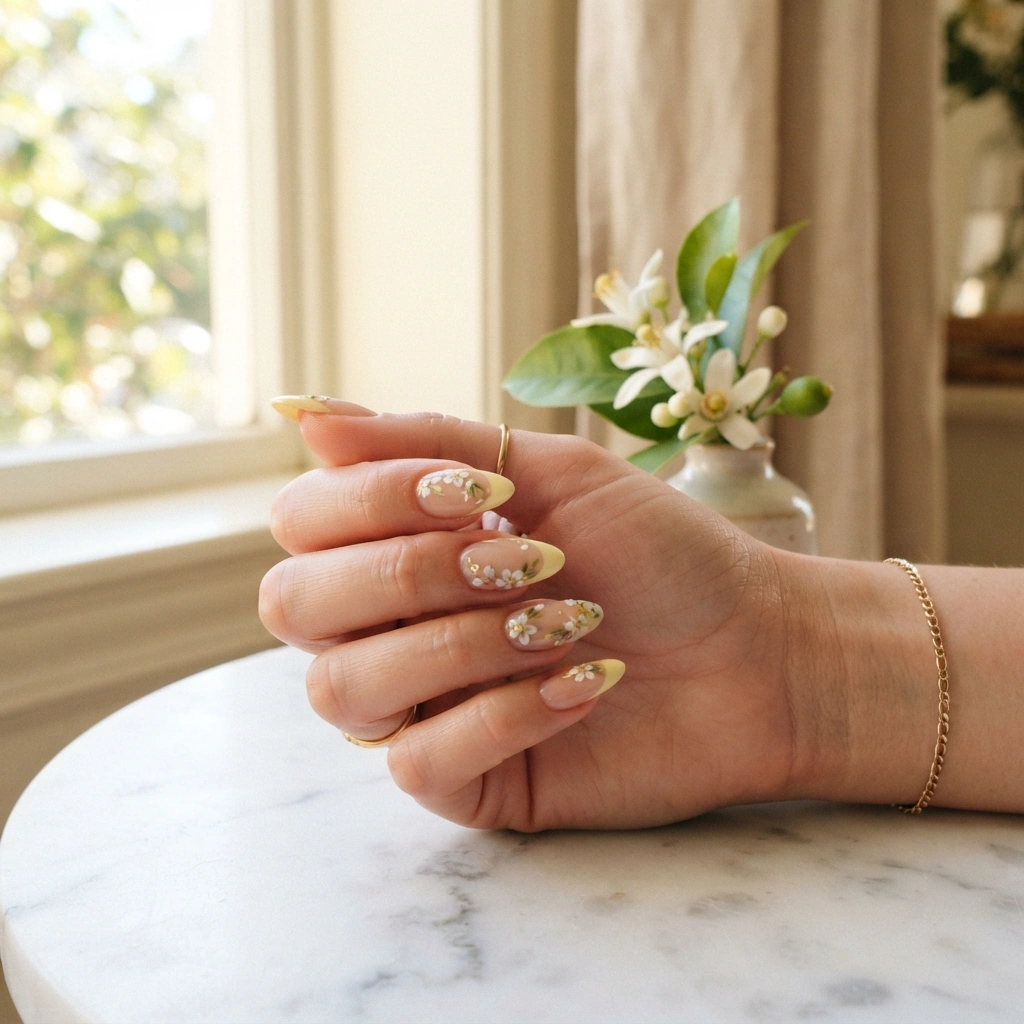
Pale yellow and white blossoms create a bright combination that feels especially fresh for spring. Lemon-inspired tips add a cheerful touch while keeping the manicure more refined than a full yellow set. Start with a translucent nude or milky base and shape soft yellow French tips along the free edge. Tiny white flowers can then be added selectively to create a delicate botanical detail. I’ve noticed this color combination looks particularly beautiful in natural daylight because the yellow appears warm while the white artwork keeps the overall manicure visually crisp and clean.
For a more minimalist version, place a single blossom on each accent nail instead of decorating every tip. You can also add tiny green leaves if you want the floral elements to look more botanical. Keep the yellow shade creamy and slightly muted for an elegant finish, especially if you prefer understated designs. Almond and oval nails provide the most space for curved French lines, but shorter nails can use thinner tips. Seal the completed artwork with a glossy topcoat to protect the details and give the pale colors a smooth, luminous appearance.
Pink Daisy French
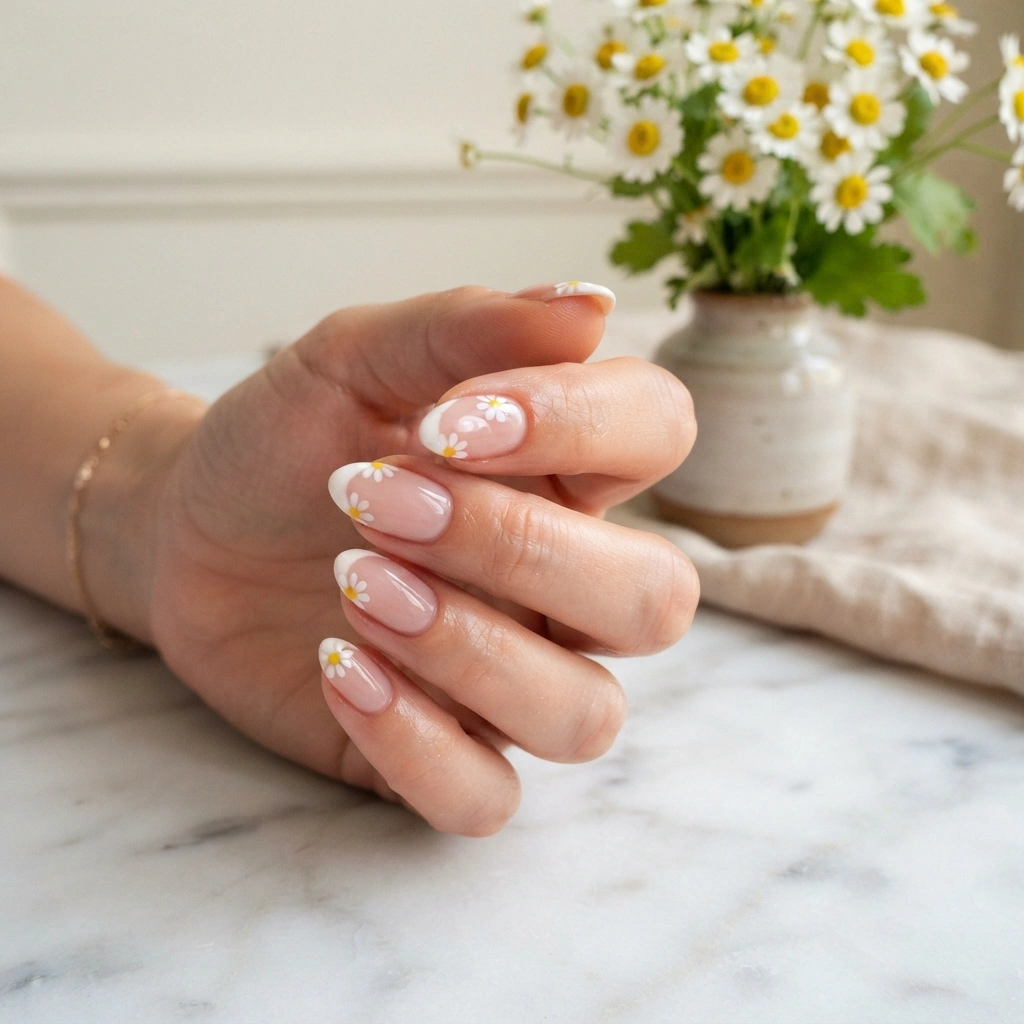
A floral French manicure combines two timeless details into one fresh spring look. Instead of creating a solid white tip, shape tiny white daisies along the free edge of each nail. A sheer blush base keeps the design delicate while the yellow flower centers provide just enough contrast. This approach feels especially polished because the artwork follows the natural curve of the nail. I’ve noticed that floral tips work beautifully when the flowers are slightly varied rather than perfectly identical. That small difference gives the manicure a more handmade appearance while keeping the overall design neat.
You can make this style more subtle by decorating only the outer corners of each French tip. For a stronger floral effect, extend a few daisies slightly across the nail surface. Almond and oval shapes naturally complement the curved arrangement, while short rounded nails can use miniature flowers for better proportion. Choose a high-quality white polish that remains opaque in thin applications so the petals stay crisp. Finish with a glossy topcoat and carefully seal the free edge. This protects the delicate artwork while giving the manicure a smooth, reflective finish suitable for everyday wear.
Conclusion
Spring nails do not need to be complicated to make a beautiful impression. From delicate florals and pastel French tips to soft chrome, botanical lines, and playful seasonal accents, these ideas offer plenty of ways to refresh your look. Choose colors that make you feel confident, then adapt the details to your favorite nail shape and everyday routine. The best march nails are the ones that feel personal rather than simply following a trend. Save this collection on Pinterest, share it with someone looking for fresh inspiration, and try your favorite design when you’re ready for a seasonal refresh. A small manicure change can bring a surprisingly bright start to spring.
Read More : Spring Floral Nails That Look Stunning