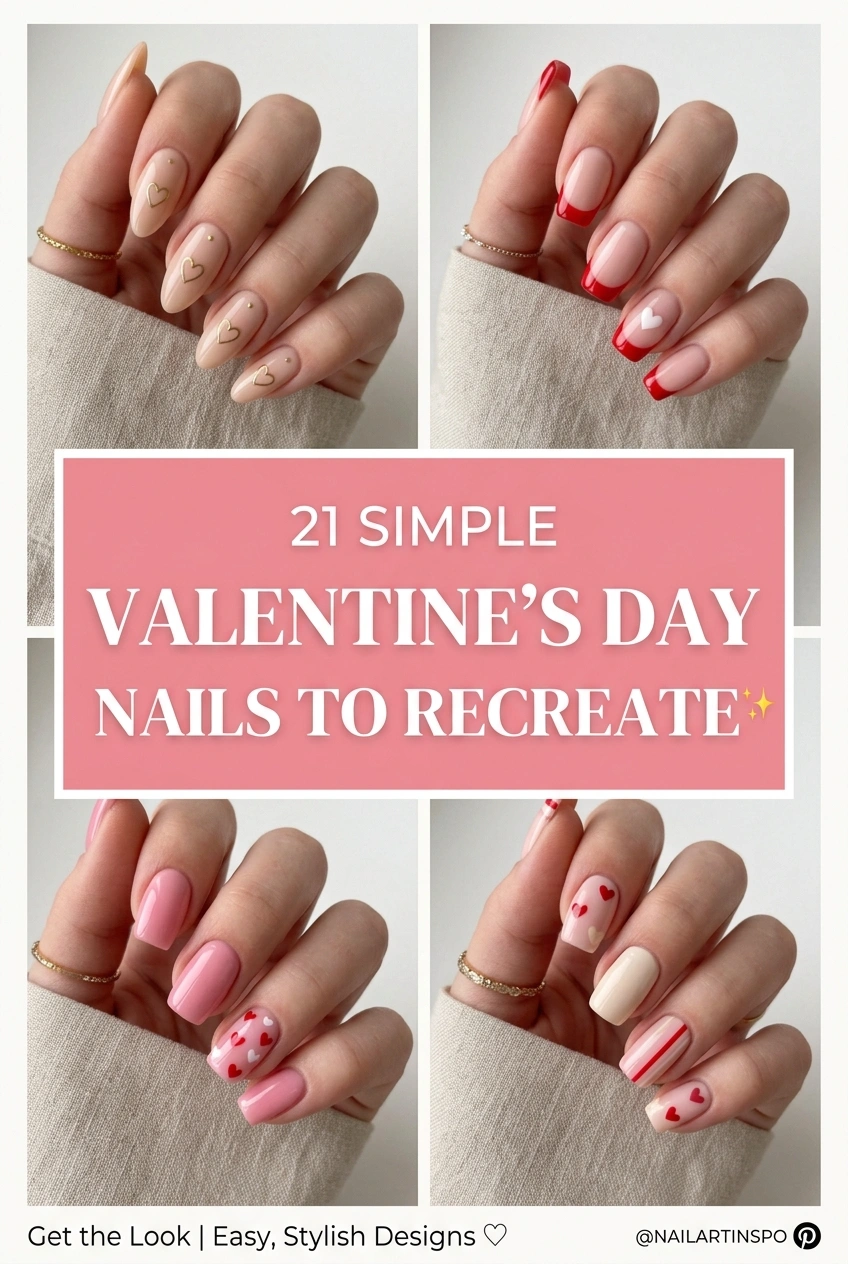
21 Simple Valentine’s Day Nails to Recreate
Introduction
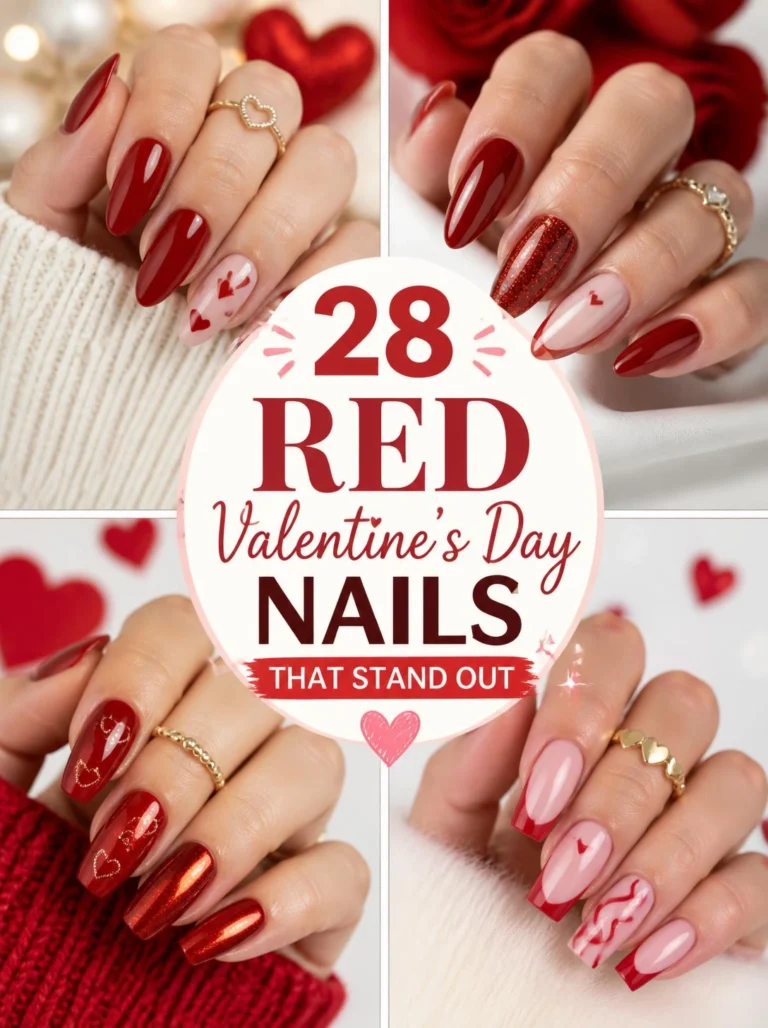
Valentine’s Day is the perfect excuse to give your manicure a little extra charm. Simple valentines day nails can look polished, romantic, and completely wearable without requiring complicated techniques or hours in the salon. This collection brings together delicate hearts, French tips, soft pinks, berry shades, bows, chrome finishes, and minimalist accents for every mood.
Whether you prefer short natural nails or longer almond shapes, these ideas make it easy to find a design that feels like you. The goal is not perfection. It is choosing small details that create a beautiful finished look. From my experience, simple designs are often the easiest to recreate and maintain because they leave room for clean shapes, balanced color, and practical everyday wear.
Tiny Heart Tips
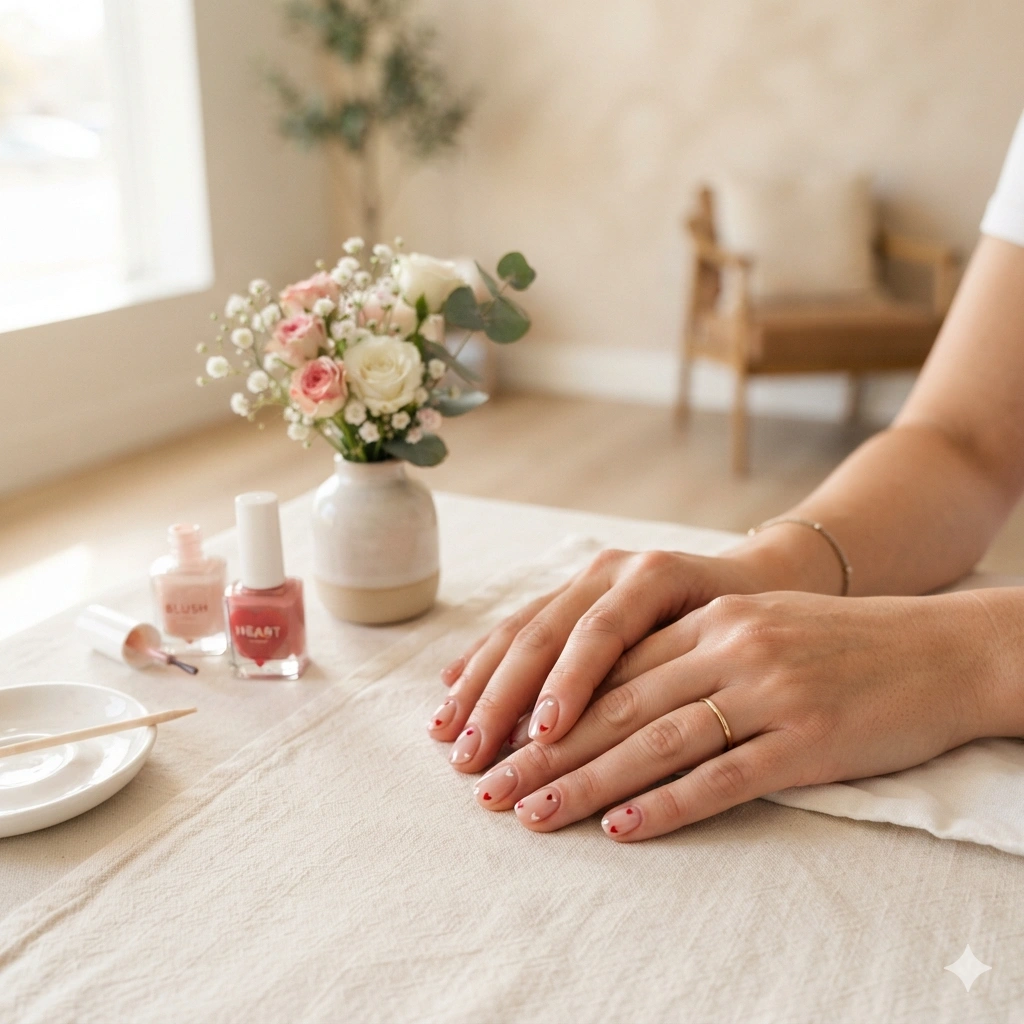
Want a romantic manicure without a complicated salon appointment? Soft pink hearts make this look instantly festive while keeping the finish clean and wearable. A sheer blush base gives the nails a healthy, polished appearance, and tiny white heart details add just enough contrast. This design works beautifully for short or medium nails because the simple shapes do not overwhelm the nail plate. In my experience, keeping the decorations small makes Valentine’s nail art feel more versatile. You can wear it with denim, a date-night outfit, or an everyday neutral wardrobe without feeling overly themed.
A delicate heart manicure proves that simple details can create a polished result. Start with a sheer pink or milky nude base, then place one tiny heart near the center or tip of each nail. Use a fine nail-art brush or dotting tool for cleaner edges, and let every layer dry before adding the next. A glossy top coat helps the colors look richer and protects the tiny designs from everyday wear. If your nails are naturally short, keep the hearts narrow and slightly elongated. That small adjustment can make the manicure look neat, balanced, and intentionally styled.
Red Pink Mix
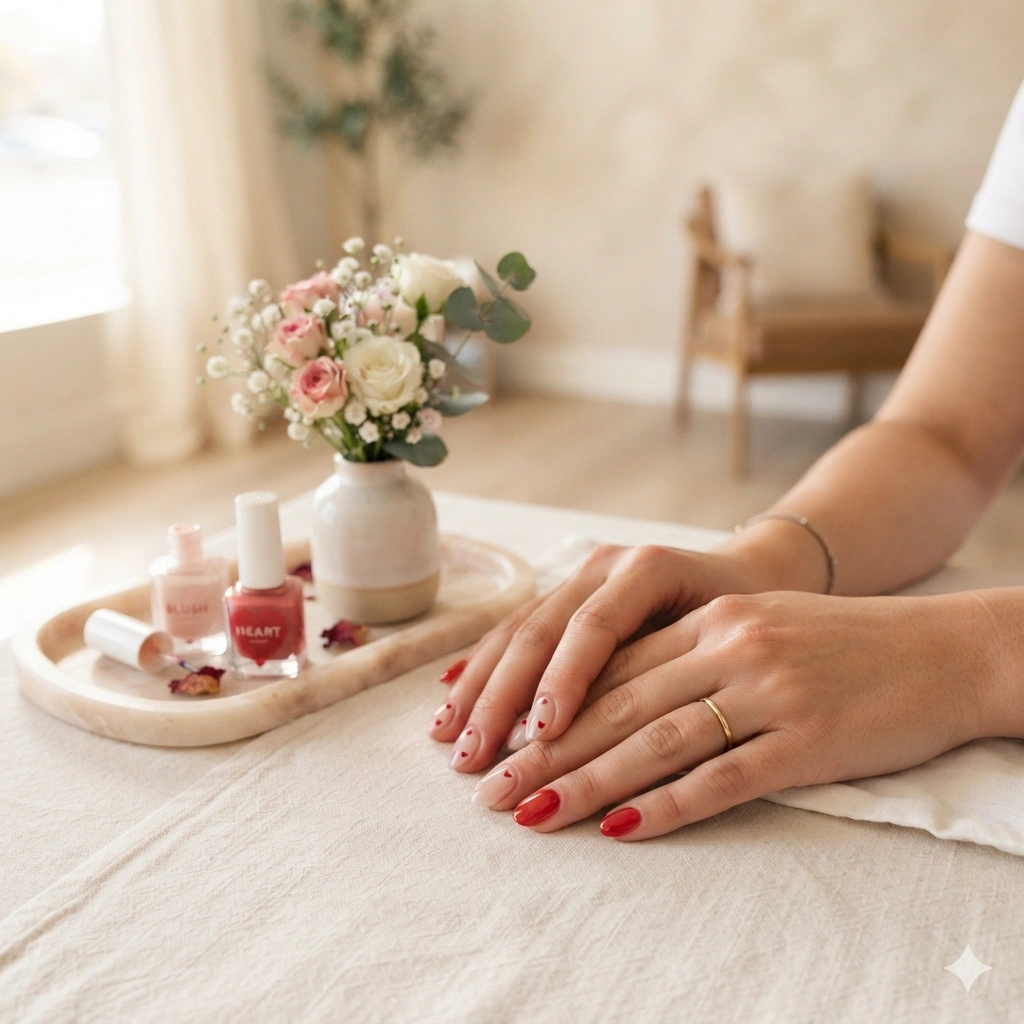
Ready for Valentine’s color without committing to bold nail art? A classic red-and-pink pairing keeps the manicure cheerful, recognizable, and surprisingly easy to recreate. Alternate soft blush and cherry-red nails, then add one minimal heart or tiny dot as an accent. The contrast gives the manicure definition without requiring detailed painting on every finger. This is especially useful when you want something festive that still feels polished enough for work or casual plans. I’ve noticed that alternating colors also creates visual rhythm, making a basic manicure look more thoughtfully designed while keeping the application beginner-friendly and forgiving.
A simple palette can make Valentine’s nails look far more intentional than a collection of random decorations. Choose one soft pink, one true red, and a neutral base, then repeat those shades consistently across both hands. For extra shine, finish with a smooth glossy coat rather than heavy embellishments. If you prefer a quieter look, use red only on the accent nails and keep the rest pink. This approach is easy to customize for almond, oval, square, or short nails. It also makes touch-ups simpler because the design relies on color placement rather than intricate artwork.
Milky Pink Hearts
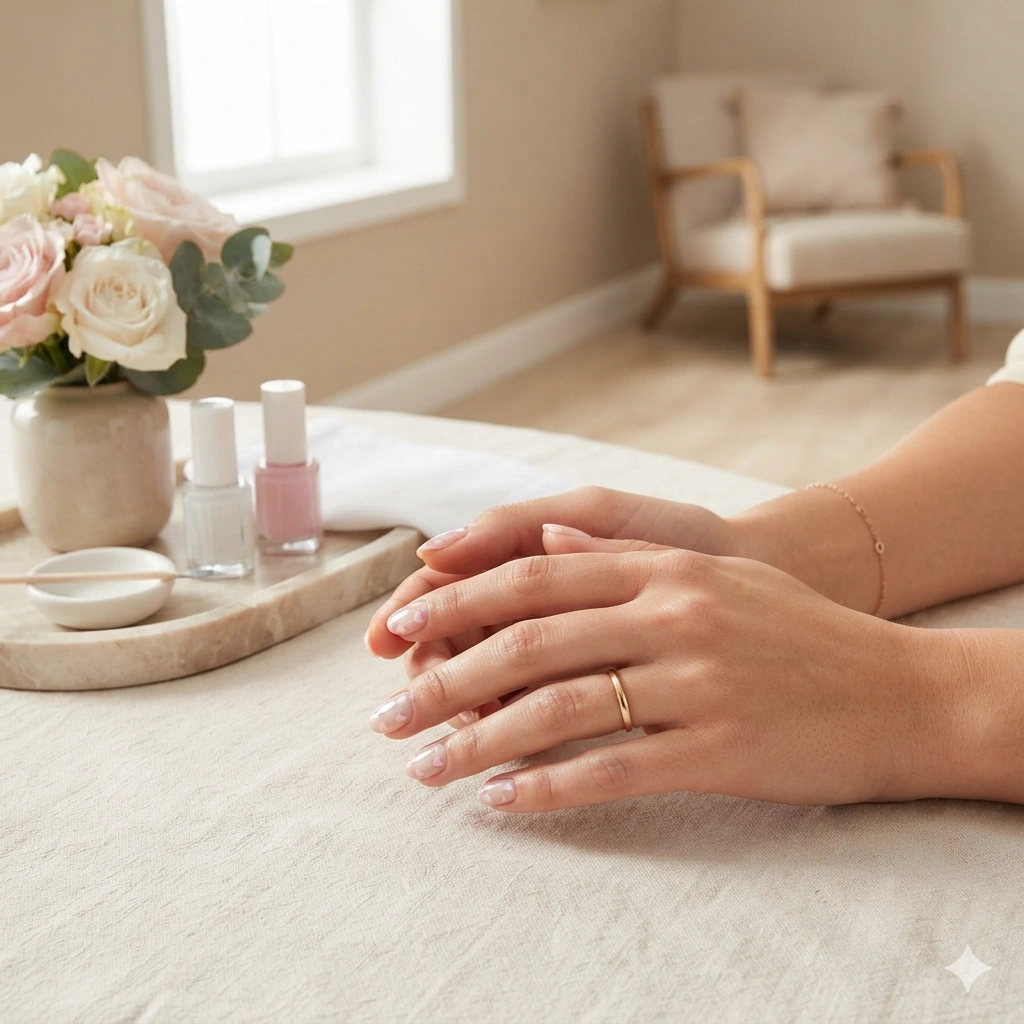
Looking for a softer take on traditional Valentine’s nail art? A milky nude base with tiny pink hearts creates an airy manicure that feels romantic without becoming overly sweet. The translucent base lets the natural nail show through, while pastel pink accents provide gentle color. Keep the hearts concentrated toward the tips for a modern micro-French effect, or scatter them lightly for a playful finish. This design suits minimal wardrobes particularly well because the muted palette blends easily with beige, cream, gray, and denim. It is also a practical choice when you want holiday-inspired nails that remain wearable after February.
The secret to making tiny heart art look polished is consistency, not complexity. Use a fine brush to create two small dots, then pull each dot inward to form the point of the heart. Keep the shapes similar in size, but do not worry if they are perfectly identical. A glossy top coat will visually soften tiny imperfections and create a smooth finish. For an even easier version, place just one heart on each accent nail. That little detail adds personality while reducing the amount of precision work, making this manicure approachable for beginners and quick to refresh.
French Heart Tips
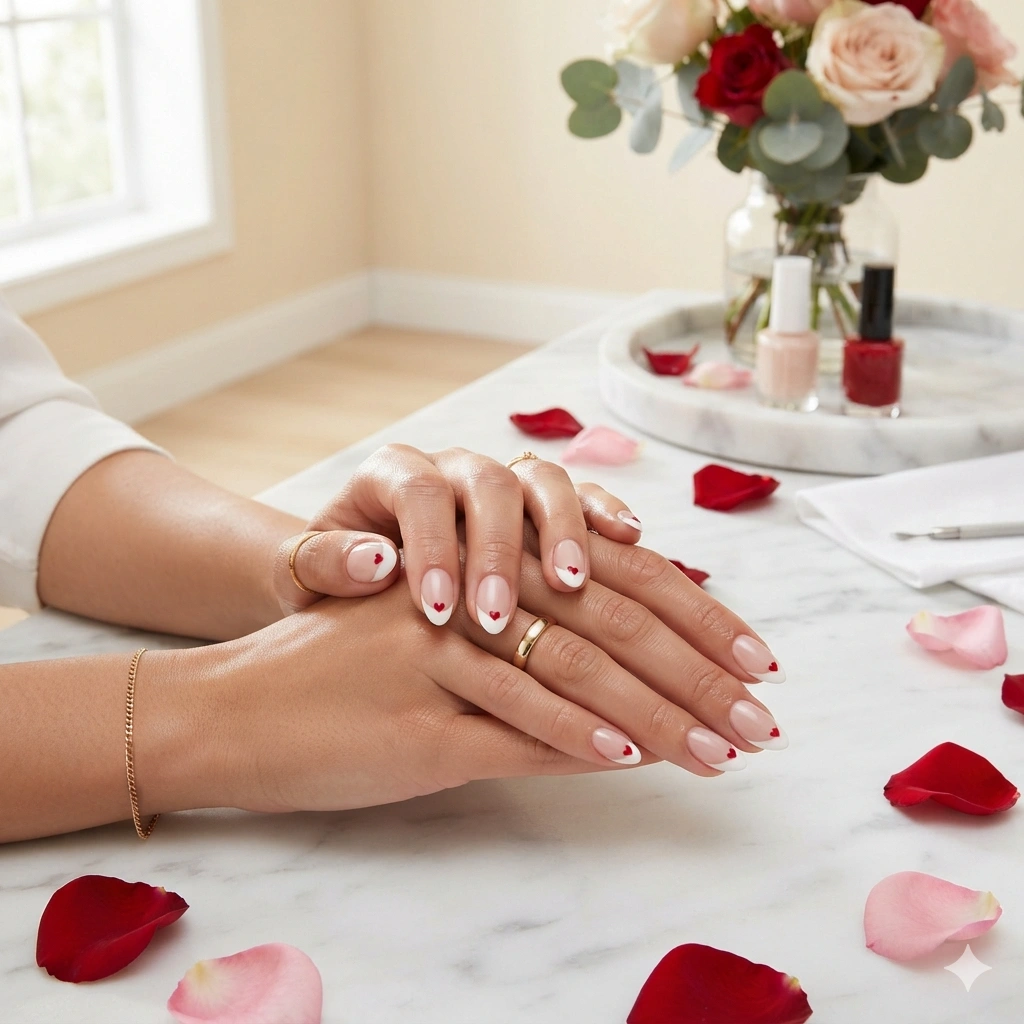
Want a classic manicure with a Valentine’s twist? French heart tips combine the clean structure of traditional French nails with one tiny romantic detail. A sheer nude-pink base creates a natural foundation, while crisp white tips keep the design elegant. Adding a miniature red heart to each tip makes the manicure feel seasonal without covering the entire nail in decoration. This style works particularly well on almond and oval shapes because the curved tips naturally complement the heart motif. It is an easy choice when you want festive nails that still look refined enough for everyday outfits and special occasions.
For a cleaner result, keep the French tips thin and consistent before adding the hearts. A fine liner brush can help create small details, while a dotting tool makes the heart shape easier to build. If traditional white feels too stark, try a soft cream or translucent pink tip instead. That subtle adjustment creates a warmer appearance and pairs beautifully with gold accessories. I’ve seen this approach work especially well when the goal is a manicure that photographs beautifully from different angles. Finish with a high-shine top coat to connect the layers and give the entire design a smooth salon-style appearance.
Cherry Accent Hearts
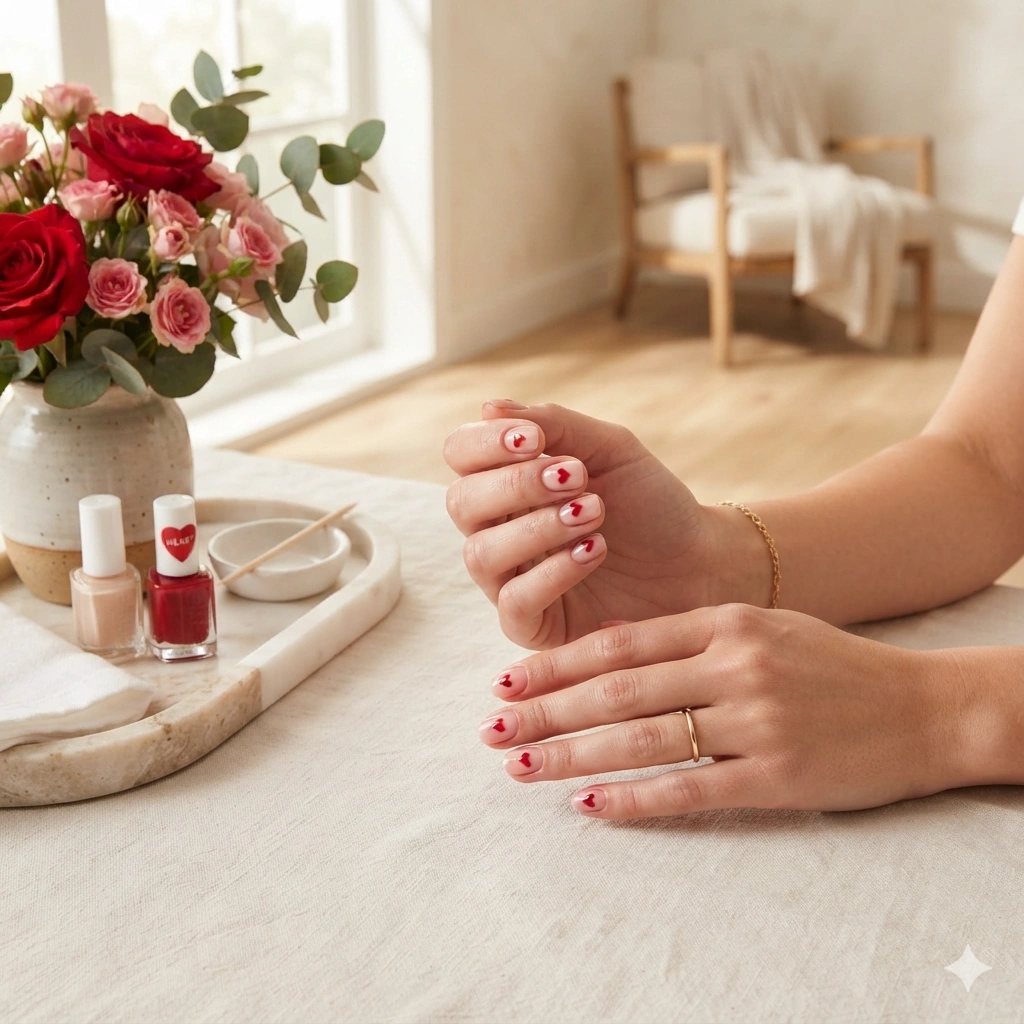
Craving a little more color while keeping your manicure simple? Cherry-red hearts against a translucent pink base create a strong focal point without turning the design into full nail art. Instead of placing identical hearts on every nail, vary their positions slightly for an effortless appearance. The rich red shade photographs beautifully and adds warmth to an otherwise delicate palette. This design is especially flattering on short squoval nails because the small motifs fit naturally within the available space. It also gives you plenty of flexibility: you can use one heart per nail or concentrate the accents on two fingers.
Small changes in placement can make a basic manicure feel surprisingly custom. Try positioning one heart near the cuticle, another toward the tip, and a few closer to the side edge. Keep the shapes relatively small so the negative space remains visible. If painting hearts feels difficult, use a dotting tool to create two connected dots and gently drag the lower edges together. A thin layer of glossy topcoat will help everything look cohesive. For a softer interpretation, replace cherry red with berry, rose, or muted raspberry. The finished effect stays romantic while giving the manicure a more personal color story.
Blush Bow Details
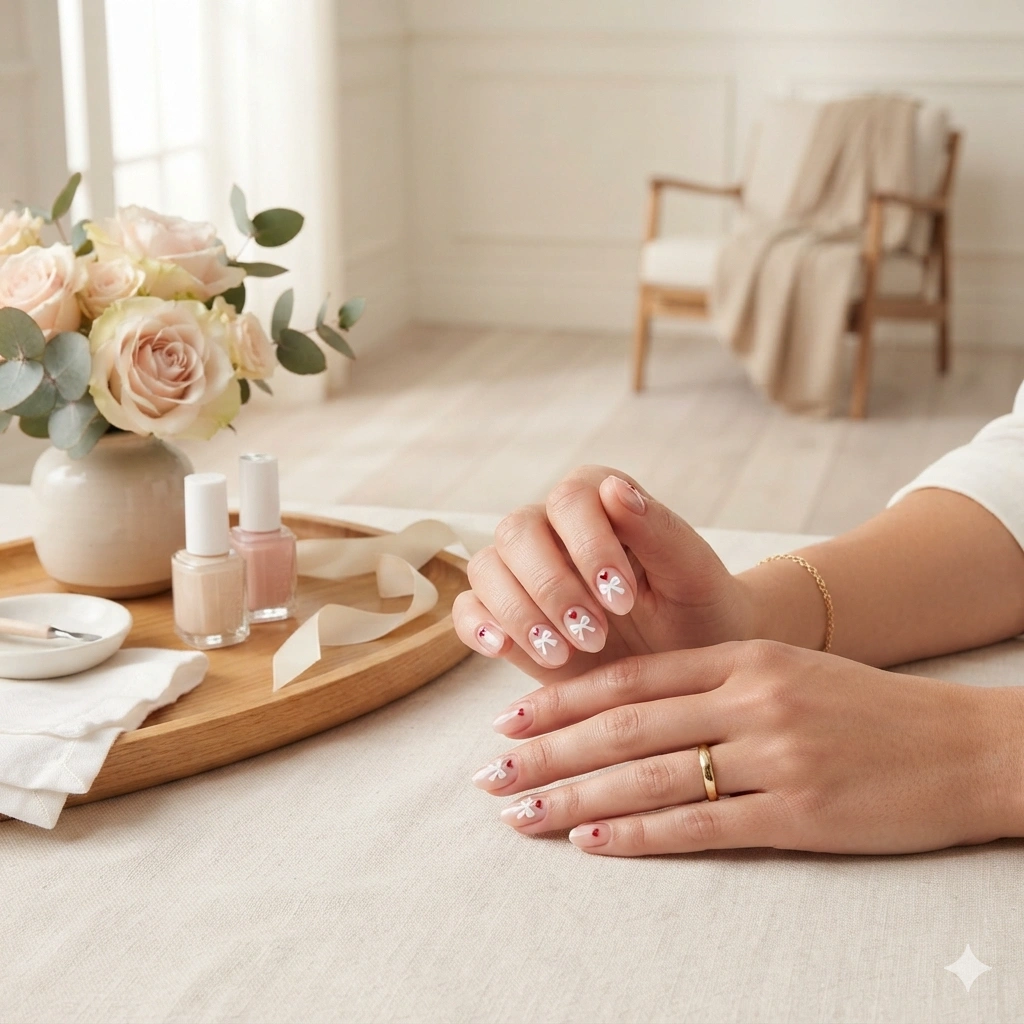
Want your Valentine’s manicure to feel delicate rather than traditionally romantic? Tiny bows offer a charming alternative to covering every nail with hearts. A translucent blush base keeps the overall appearance soft, while miniature white bows add a subtle decorative element. You can place one bow on each accent nail or create a slightly different arrangement across the manicure. The result feels feminine without looking overly elaborate. This design is particularly lovely with oval or almond nails because the elongated shape gives small motifs enough breathing room. It also pairs naturally with pearl jewelry, satin clothing, and soft neutral accessories.
The easiest way to keep bow details looking sophisticated is to prioritize spacing. Rather than filling the nail with several decorations, leave generous negative space around each motif. A fine nail-art brush works well for drawing two loops and a small center knot, while a tiny rhinestone can replace the painted center if you want extra dimension. Choose white, cream, or pale pink for the bows when you prefer a subtle finish. For more contrast, add a single red bow as an accent. In my experience, limiting stronger colors to one or two nails keeps detailed designs looking balanced.
Pink Chrome Hearts
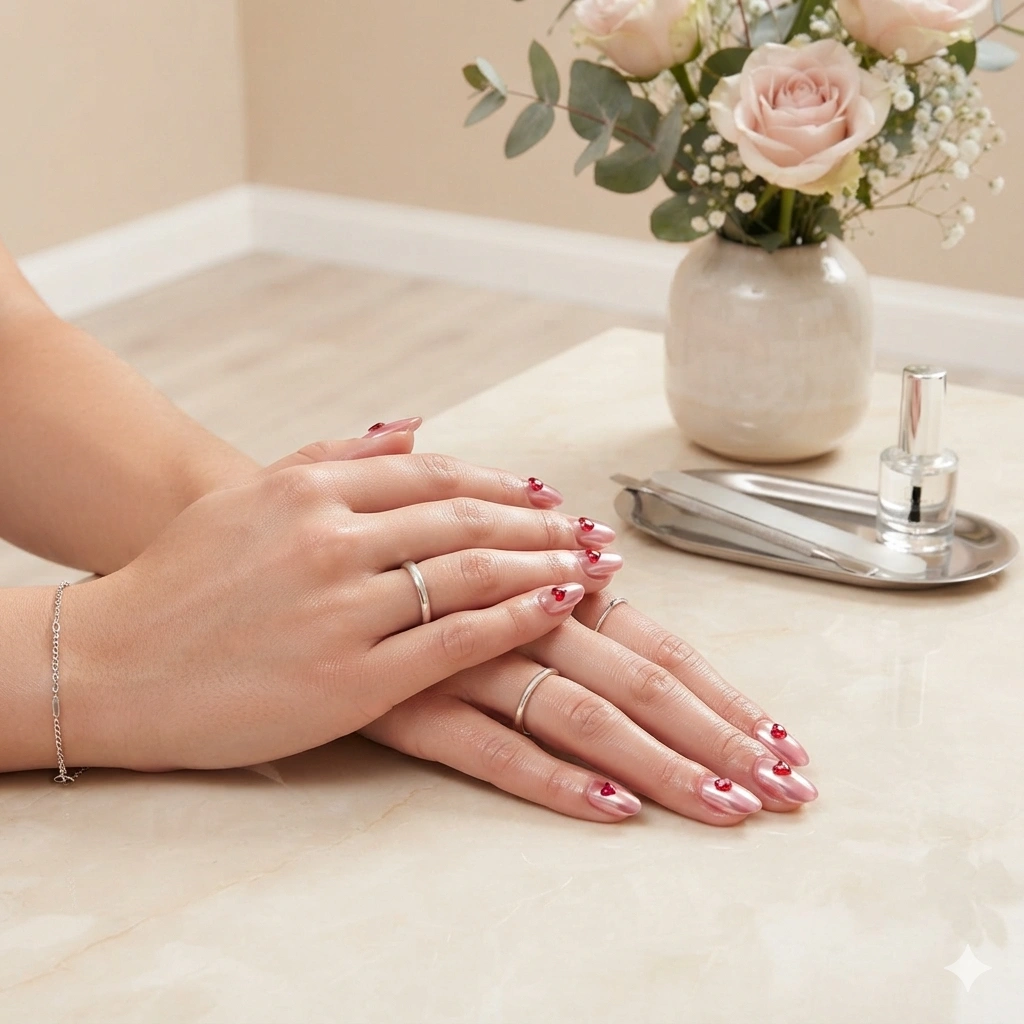
Ready for Valentine’s nails that catch the light beautifully? A soft pink chrome finish gives a simple manicure an instantly elevated appearance, while tiny red hearts keep the theme recognizable. Unlike heavy glitter, chrome creates a smooth reflective surface that can look surprisingly sophisticated. The rosy tone works especially well with almond and oval nail shapes because the elongated surface gives the metallic finish more room to reflect. Keep the hearts limited to a few accent nails if you prefer a quieter result. This balance makes the manicure suitable for date nights, parties, photos, and everyday wear.
Chrome looks best when the underlying manicure is smooth and evenly shaped. Start with a clean base, apply your pink color carefully, and use chrome powder according to the product directions. Once the reflective layer is sealed, add tiny heart details using a highly pigmented red polish. Keep the artwork minimal so it does not compete with the metallic surface. If full chrome feels too bold, use it only on two accent nails and keep the remaining nails glossy pink. This creates contrast while making maintenance easier. A tidy cuticle area will also help the reflective finish look especially polished.
Red Heart French
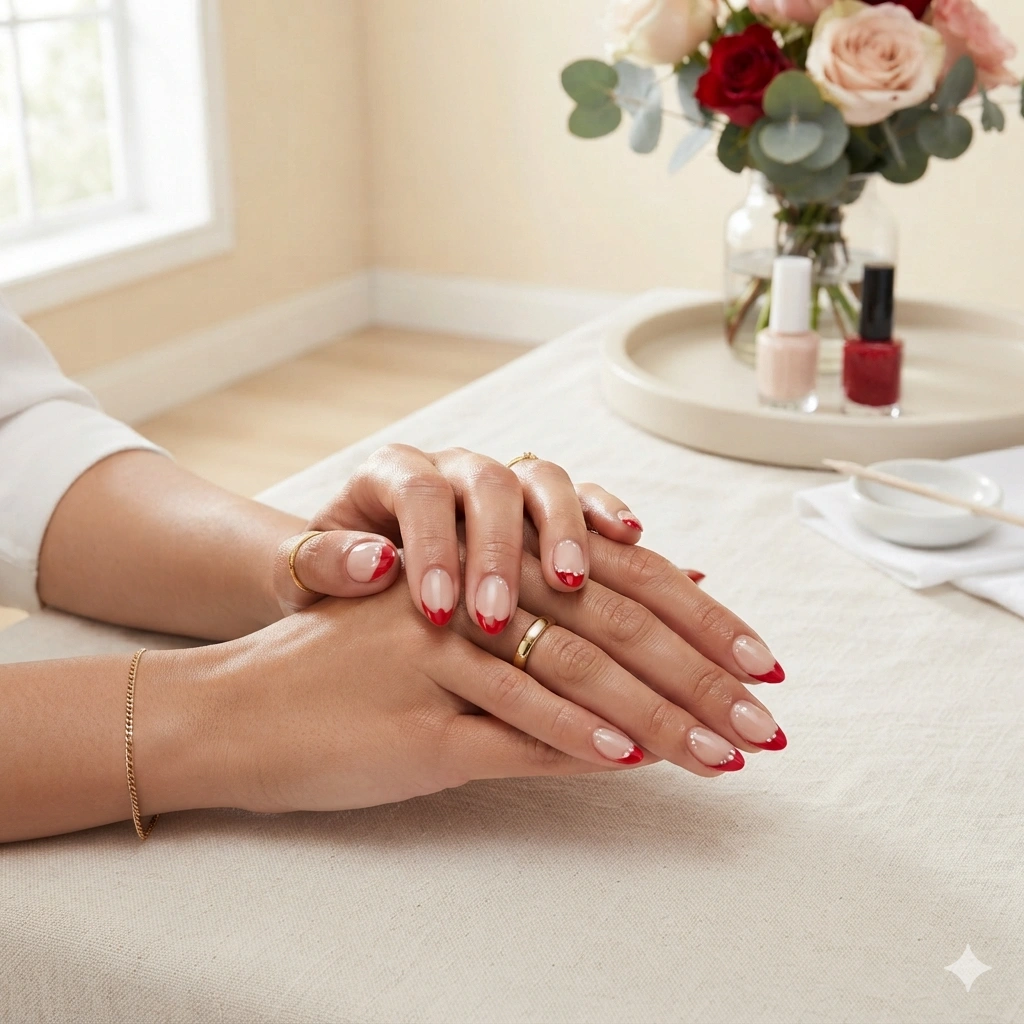
What if your French manicure could feel festive without using traditional heart stickers? Shaping the red tips into gentle heart-like curves creates a fresh interpretation of classic French nails. The nude base gives the design plenty of negative space, allowing the red edges to become the main visual feature. This works beautifully on short almond nails because the tapered shape naturally supports curved detailing. The result feels romantic but still clean and modern. It is also a useful option when you want something more noticeable than tiny heart accents while avoiding a manicure that looks heavily decorated.
Precision matters most around the tips, so take your time when creating the curved red edges. A thin brush can help outline the shape before you fill it in. If both sides of the heart do not match perfectly, keep the curves soft rather than trying to force sharp symmetry. That creates a more natural handmade finish. Use a sheer beige or pink base to soften the contrast, then seal everything with glossy topcoat. For a subtle variation, make only two nails heart-tipped and leave the others with classic red French tips. The mixed approach adds visual interest without extra complexity.
Love Letter Accents
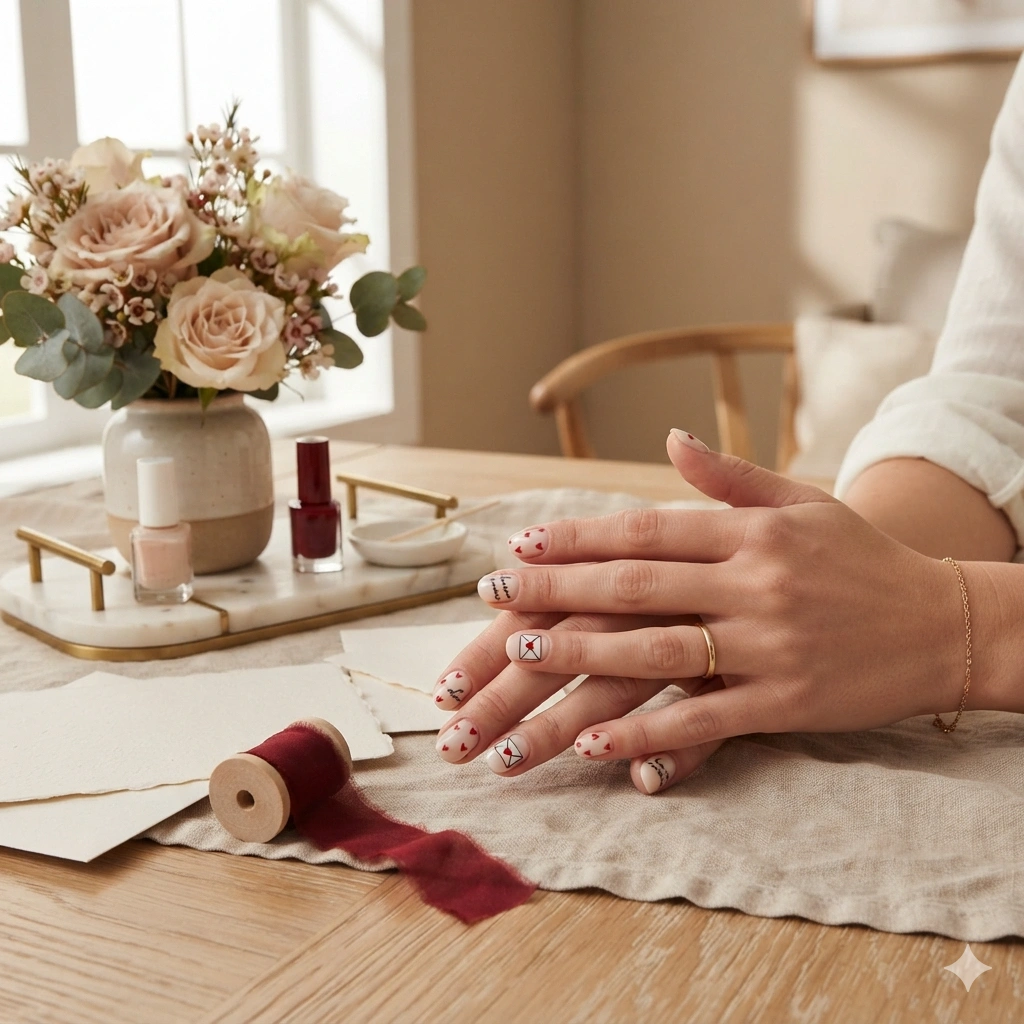
Looking for a Valentine’s manicure with a little personality? Love-letter accents turn simple nails into a tiny stationery-inspired design. Start with a milky cream or soft nude base, then decorate one or two accent nails with miniature red hearts, envelope shapes, or short handwritten-style marks. Keeping the artwork limited prevents the manicure from becoming visually busy. The neutral background also makes the red details stand out beautifully. This idea is especially fun for anyone who enjoys themed nails but prefers subtle designs. It can be adapted to short nails by choosing only one small symbol per accent nail.
Tiny lettering can be difficult to recreate, so simple symbols are often the better choice at home. A small heart, envelope outline, or pair of dots can communicate the theme without demanding perfect handwriting. Use a fine liner brush and highly pigmented polish for sharper details, and allow each layer to dry before adding another. If you want a more dimensional result, add a tiny pearl or metallic dot beside one heart. I’ve noticed that leaving plenty of bare space around miniature artwork makes it appear cleaner and more intentional. Finish with a glossy topcoat to protect the details.
Berry Pink Hearts
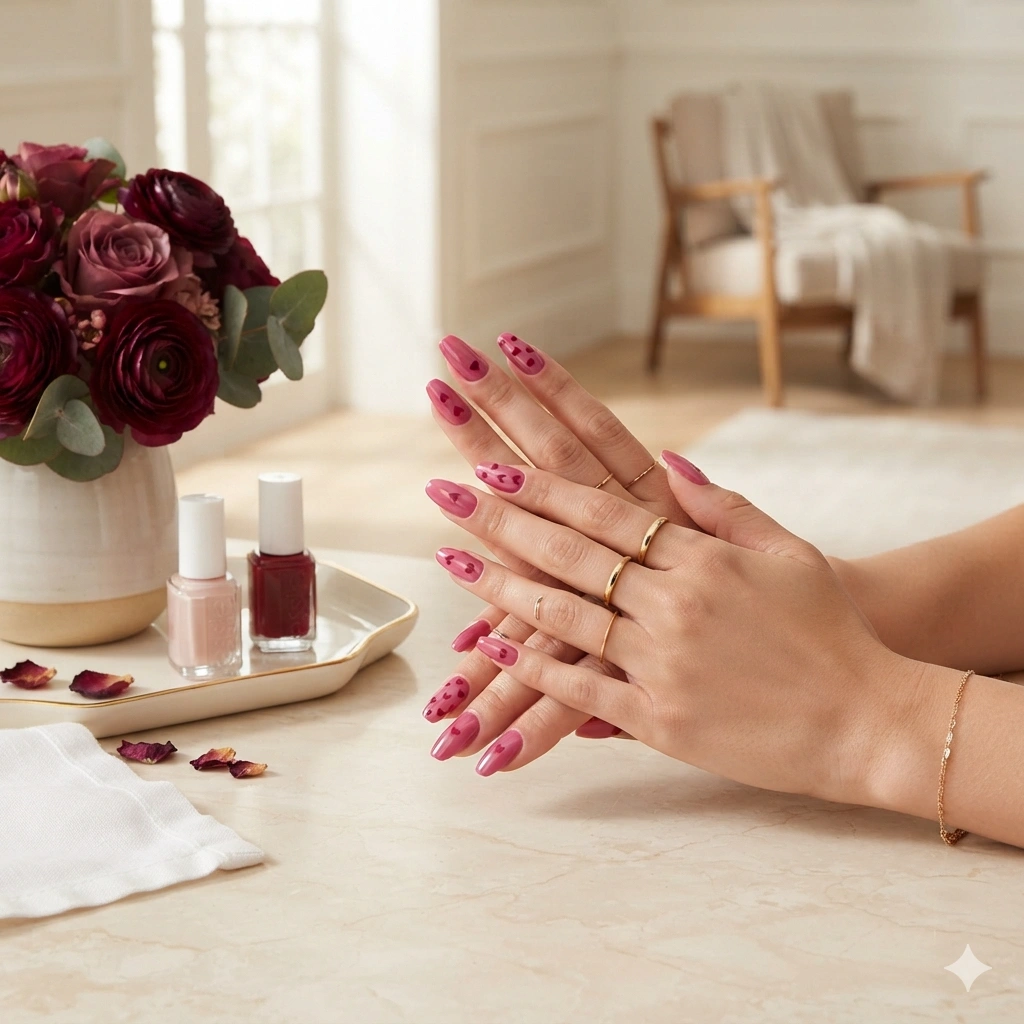
Want a Valentine’s manicure with deeper color and a little more sophistication? Berry pink creates a rich foundation that feels romantic without relying on traditional bright red. Add tiny deep-red hearts to a few nails for subtle contrast, allowing the glossy base to remain the main feature. This combination works especially well during evening events because darker shades reflect light beautifully. Coffin and almond shapes give the color plenty of surface area, while shorter versions can keep the design practical. The result is polished, grown-up, and festive enough for Valentine’s plans without looking overly themed.
When working with darker pinks, even application makes a noticeable difference. Apply thin coats rather than one thick layer to prevent uneven texture and allow the color to dry properly. Use a small brush for the hearts, keeping them slightly smaller than you might use on a pale base. This creates stronger contrast without making the nails feel crowded. If berry pink feels too intense, soften the manicure by using a nude accent nail. A glossy finish is particularly effective here because it deepens the color visually. Keep the cuticles clean, and the entire manicure will look more refined.
Minimal Red Dots
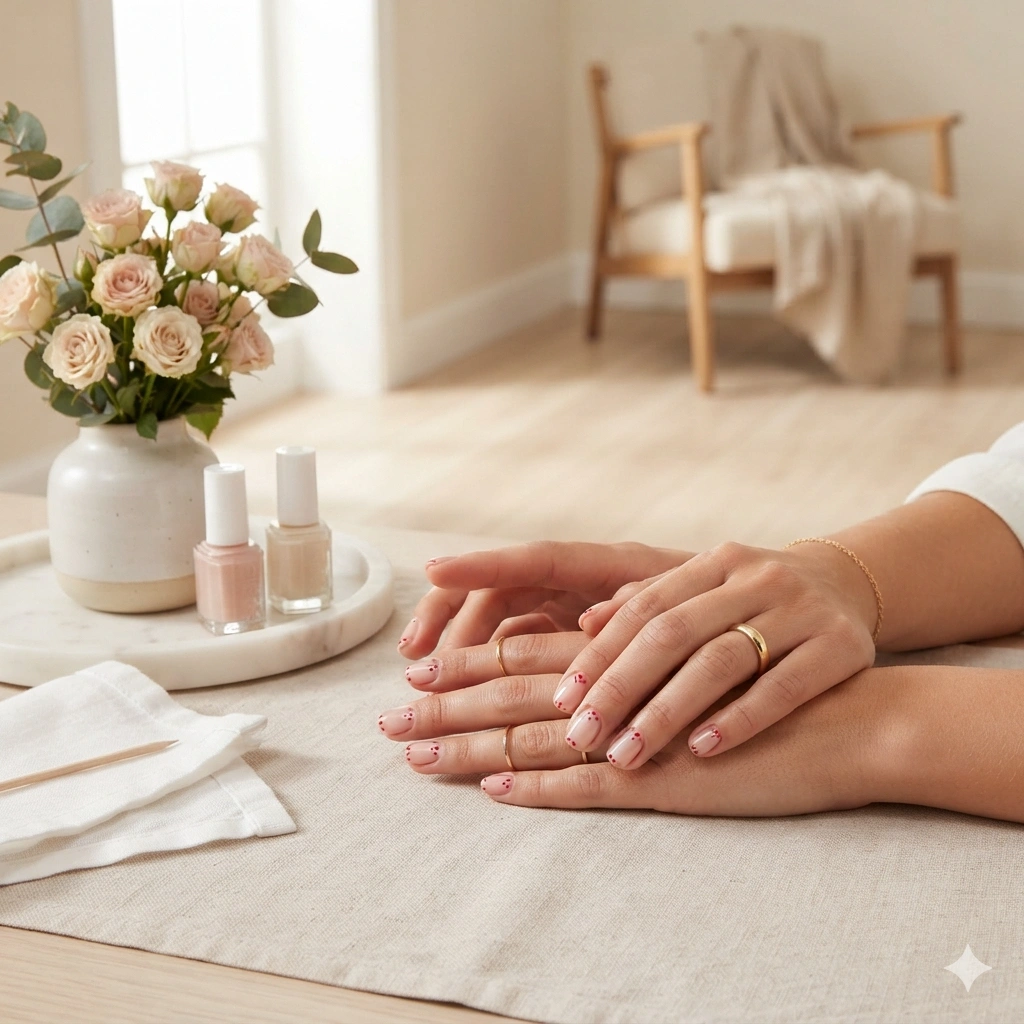
Sometimes the simplest Valentine’s manicure is the one that feels easiest to wear. Tiny red dots offer a playful seasonal accent without requiring detailed nail-art skills. Place a few dots near the tips, along the sides, or around the center of selected nails. The sheer blush background keeps everything soft and understated, while the red creates enough contrast to make the design noticeable. This approach is especially helpful for short nails because dots require very little space. It also suits minimalist wardrobes, allowing the manicure to complement clothing rather than compete with it.
A dotting tool makes this design remarkably approachable. Dip only the tip into your polish, then gently touch the nail surface to create a small circle. Use different sizes for a more organic appearance, but keep the largest dots relatively small. If you do not have a dotting tool, the rounded end of a small bobby pin can work for simple accents. Let the dots dry completely before applying topcoat to prevent smudging. For extra interest, arrange three dots in a tiny heart formation on one accent nail. That subtle detail connects the manicure to Valentine’s Day while keeping the overall look minimal.
Soft Rose French
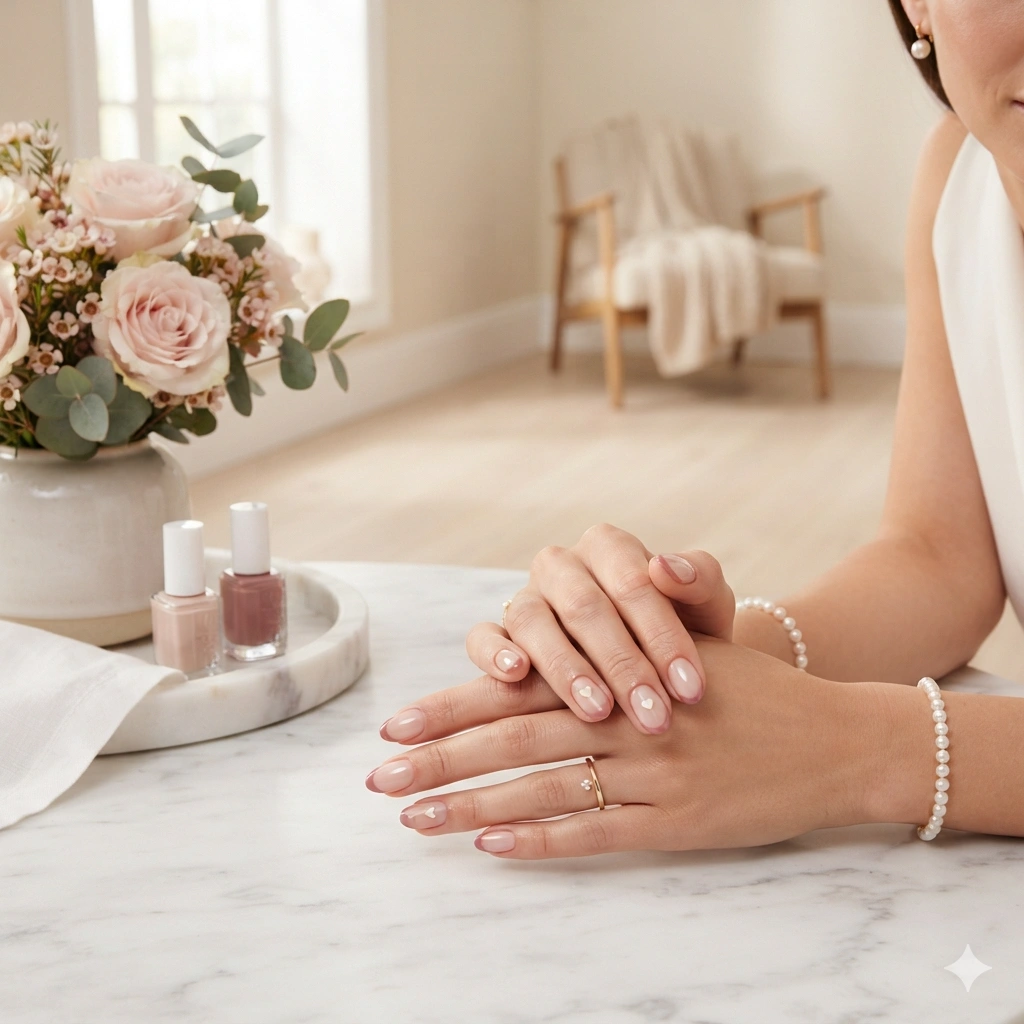
Prefer Valentine’s nails that can transition effortlessly into the rest of the season? Soft rose French tips offer a beautiful middle ground between traditional French polish and romantic nail art. A muted dusty-rose shade feels sophisticated, while tiny cream hearts add just enough Valentine’s character. The translucent base keeps the manicure light and helps the tips look delicate rather than heavy. This design is especially flattering on oval nails because the curved silhouette mirrors the rounded French edge. It is a great option when you want something feminine and polished that will not feel outdated as soon as Valentine’s Day passes.
The key to this look is choosing a rose shade with enough contrast to show against the base. Test the polish on a practice nail before applying it to the full manicure. Keep the French line narrow for a more modern appearance, especially if your nails are short. Add hearts only after the tips are completely dry, and place them sparingly near the cuticle or on accent nails. A glossy topcoat will unify the soft colors and smooth the surface. If you prefer warmer tones, choose dusty coral or muted raspberry instead of rose for an equally wearable finish.
Candy Heart Nails
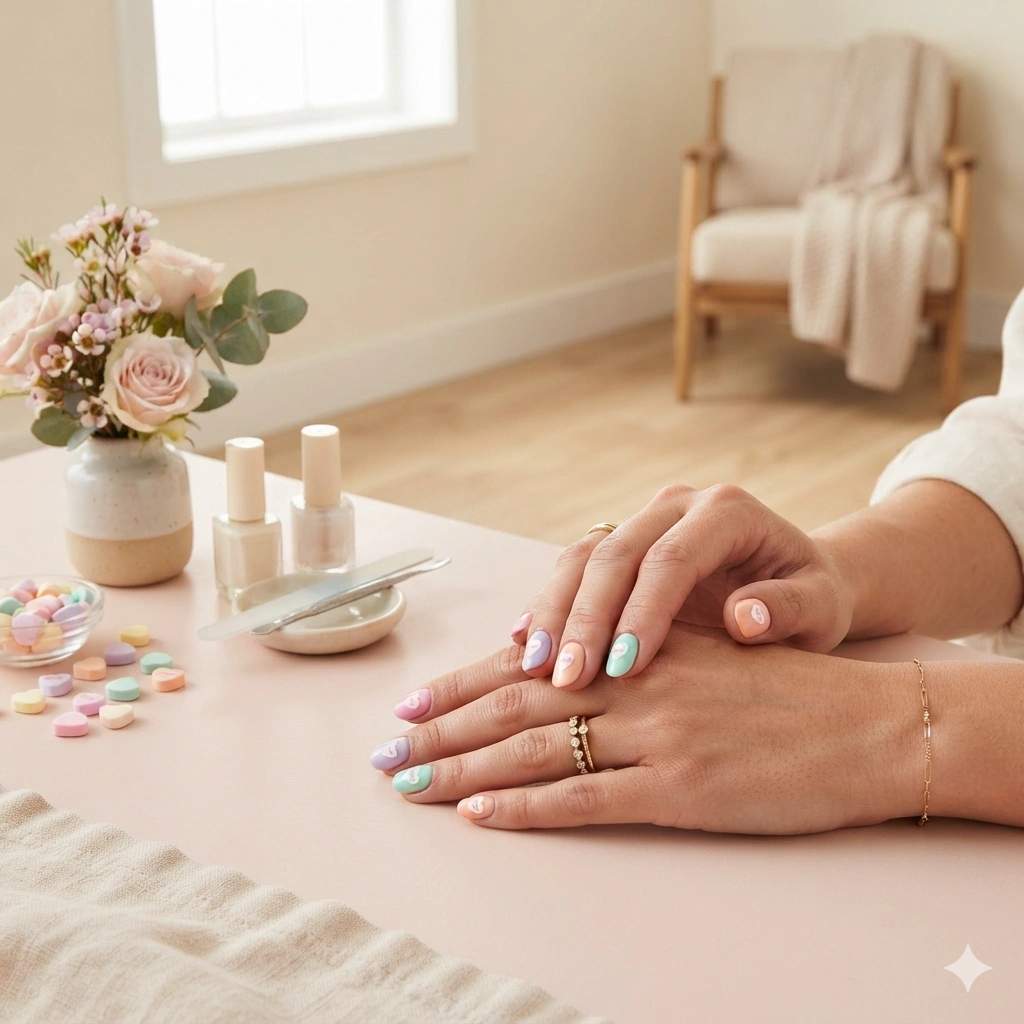
Sweet, playful, and instantly recognizable, candy-heart nails bring a nostalgic Valentine’s feeling to your fingertips. Instead of using one dominant color, combine soft pastel shades such as pink, lavender, peach, mint, and cream. Tiny white hearts or simple lettering can complete the candy-inspired effect. The variety keeps the manicure lively while the soft palette prevents it from becoming overwhelming. This style works particularly well for casual outfits, weekend plans, and festive gatherings. If you prefer a more grown-up version, use only two or three muted pastels and skip the lettering while keeping the tiny heart motifs.
The best candy-inspired manicures rely on a controlled color palette. Choose three to five shades that have similar softness rather than mixing extremely bright and muted colors. Paint each nail with one dominant shade, then add small white accents once the base is completely dry. A fine liner brush works well for tiny marks, while a dotting tool can create miniature hearts. Because pastel polish can sometimes look streaky, two thin coats usually give a smoother result than one heavy layer. Seal the finished design with glossy topcoat to enhance the creamy, candy-like appearance and protect the small details.
Negative Space Hearts
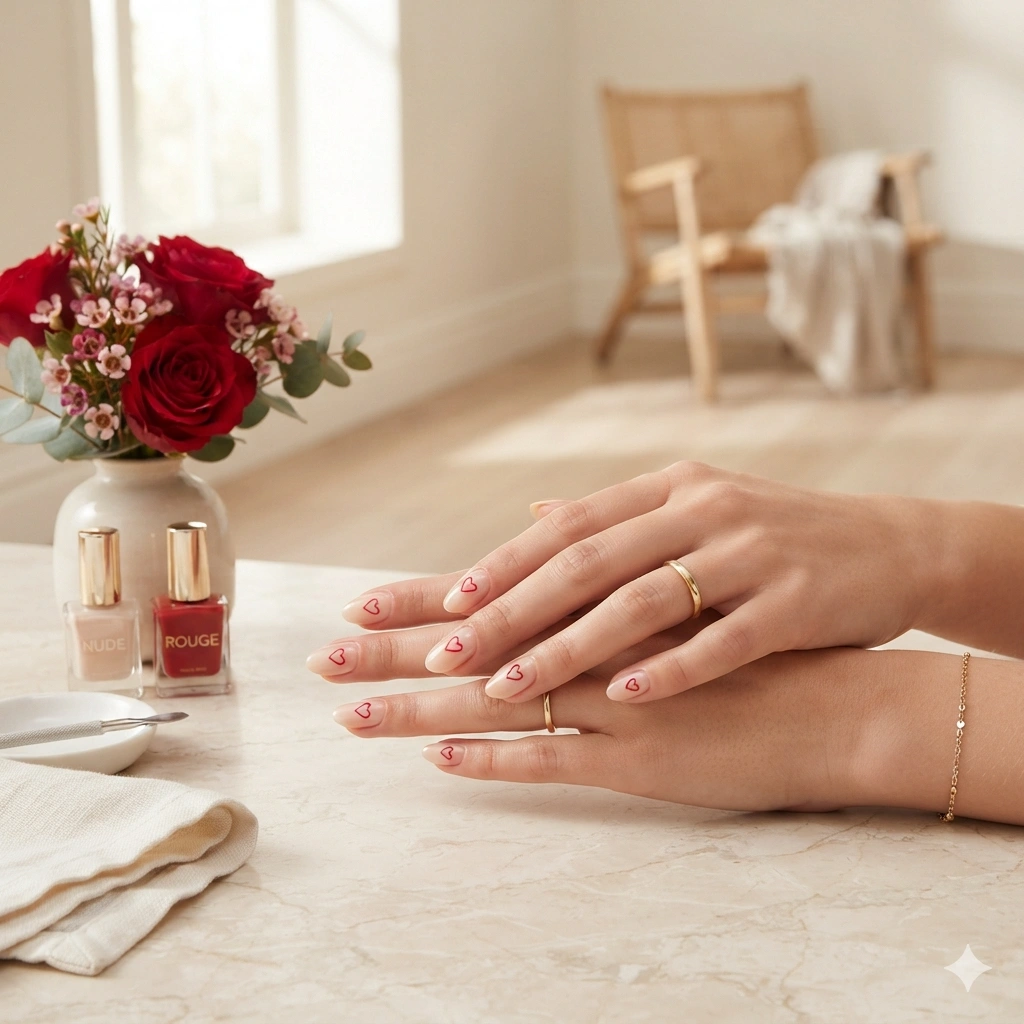
Want Valentine’s nail art that feels modern and minimal? Negative-space hearts leave much of the natural-looking nail visible, creating an airy design with plenty of visual breathing room. Instead of filling each heart completely, outline the shape using a fine red or pink brush. The transparent areas make the manicure look lighter and can also help disguise early regrowth. This style is especially attractive on almond nails because the elongated surface gives the heart outlines room to stand out. It is a smart choice when you like nail art but prefer designs that do not feel overly decorative.
A clean base is essential for negative-space manicures because more of the natural nail remains visible. Start by shaping and lightly buffing the nails, then apply a thin clear or sheer nude layer. Once dry, sketch the heart outline slowly with a fine brush rather than trying to complete the entire shape in one motion. Small imperfections are less noticeable when the line is intentionally delicate. If red feels too bold, use dusty pink, burgundy, or white. Finish with a smooth glossy coat, carefully covering the edges. The result is understated, modern, and easy to coordinate with almost any outfit.
Burgundy Love Tips
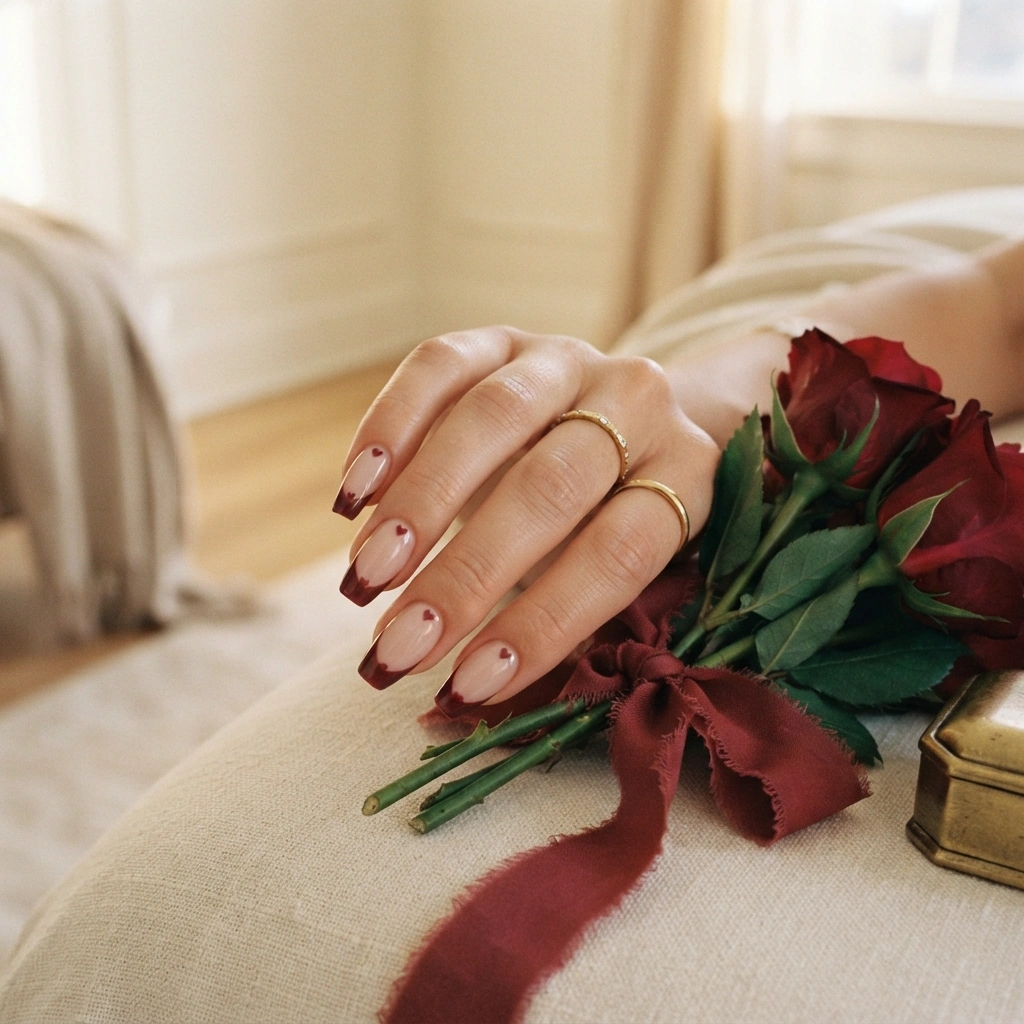
Looking for a moodier alternative to classic red Valentine’s nails? Burgundy tips bring depth and sophistication while still keeping the manicure unmistakably romantic. Pair a translucent beige-pink base with deep wine-colored French tips, then add one or two tiny matching hearts for extra detail. The darker shade looks especially striking under evening lighting and pairs beautifully with gold jewelry or satin textures. This design works across several nail shapes, although coffin and almond silhouettes give the curved tips plenty of room. It is festive enough for Valentine’s celebrations but polished enough for dinners, events, and winter evenings.
Deep burgundy polish can sometimes appear heavy, so keeping the base translucent is an easy way to balance it. Apply the tips carefully and keep their thickness consistent across every nail. If you struggle with French lines, use guide stickers or a small angled brush for greater control. Once the tips are dry, place tiny hearts only where they add visual interest. A glossy topcoat will make the burgundy appear richer and more dimensional. For a softer version, substitute muted cranberry or raspberry. The overall effect remains romantic while feeling more sophisticated than a traditional bright-red manicure.
White Heart Accents
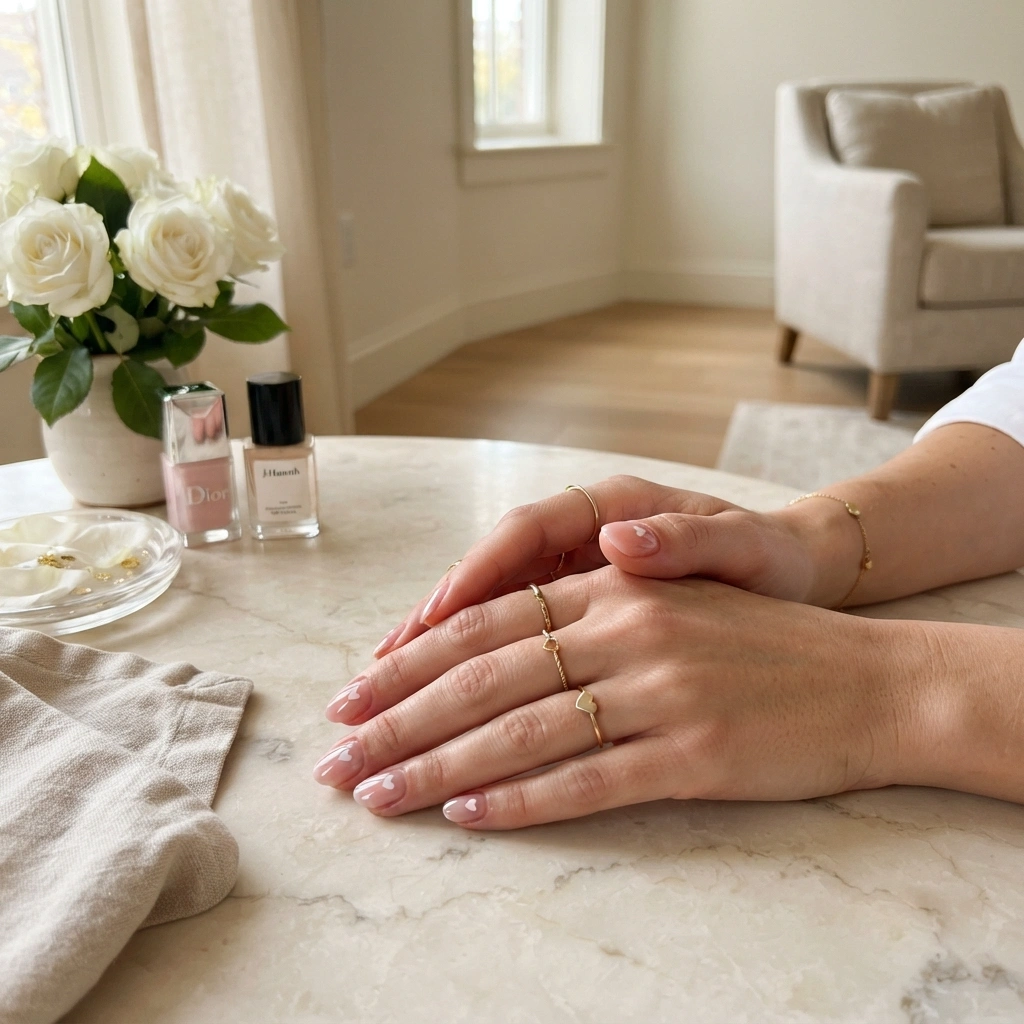
Need a Valentine’s manicure that feels romantic but incredibly clean? Tiny white hearts against a sheer pink base create a soft contrast that works beautifully for everyday wear. The white details feel lighter than traditional red artwork, making this design especially appealing if you prefer neutral or minimalist nails. Place the hearts on alternating nails instead of every finger to preserve plenty of negative space. This approach also makes the manicure easier to recreate because you only need to concentrate on a few detailed areas. The result looks delicate, polished, and effortlessly coordinated with light-colored outfits.
For the neatest finish, choose a highly pigmented white polish so the hearts remain visible against the pink base. Use a fine brush or dotting tool to create two small rounded sections, then pull them gently toward a center point. Keep the hearts relatively uniform, but do not worry about absolute perfection. A glossy topcoat can soften tiny inconsistencies and give the whole manicure a professional appearance. If white feels too stark, try ivory or pearl instead. Those warmer shades create a subtle variation while maintaining the same delicate Valentine’s character and keeping the manicure easy to wear beyond February.
Strawberry Pink Tips
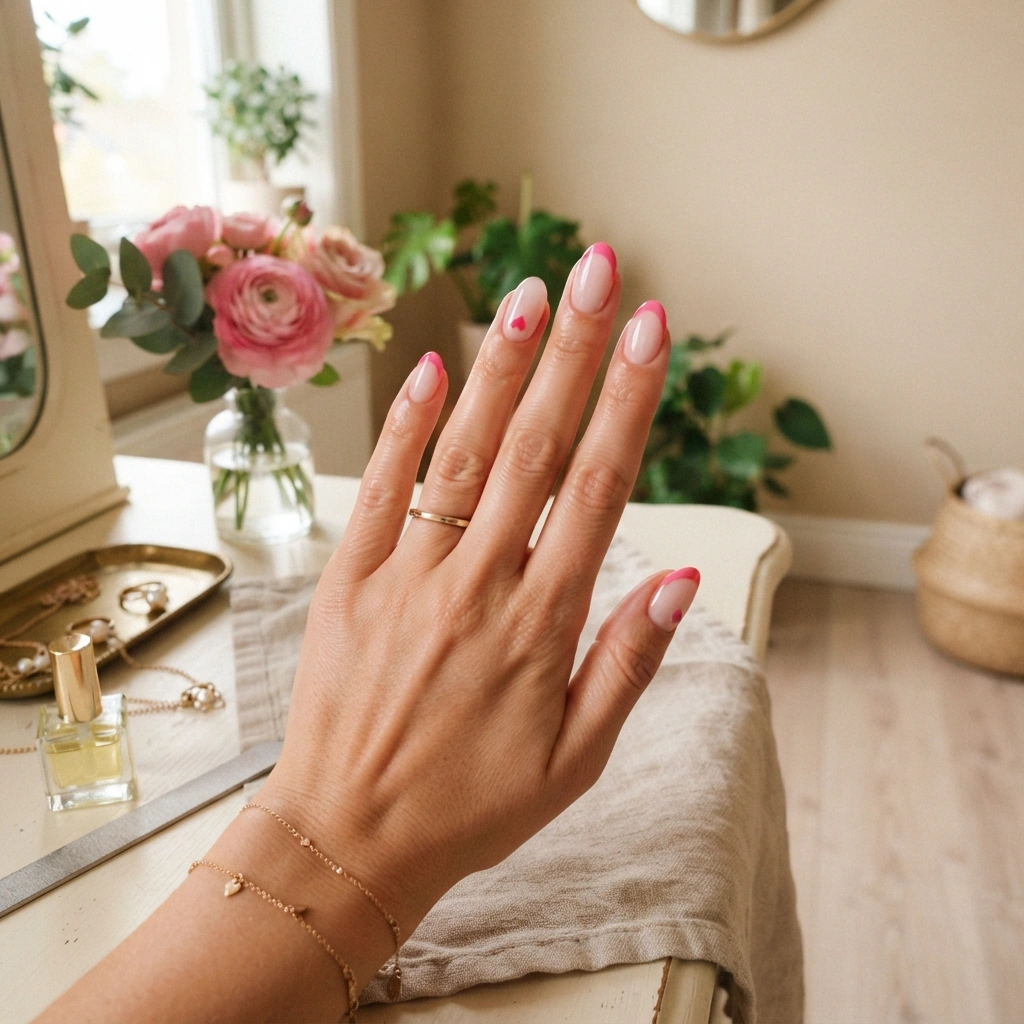
Brighten up your Valentine’s manicure with strawberry-pink tips that feel cheerful without becoming overly bold. The translucent base keeps the look airy, while the brighter tips introduce enough color to make the manicure stand out. Add tiny matching hearts to one or two accent nails for a simple seasonal finish. This design is especially flattering on oval and almond shapes because the curved tips follow the natural silhouette of the nail. Unlike a heavily themed manicure, the fresh pink palette can transition easily into spring. That makes it a practical option when you want festive nails with longer-lasting style appeal.
To make the tips look even, begin by creating a thin guideline across each nail before filling in the color. A fine angled brush can help sharpen the edges and correct small mistakes. Choose a strawberry shade with a glossy finish rather than a heavily glittered formula if you want a cleaner appearance. Once the tips are completely dry, add tiny hearts sparingly. If you have short nails, make the French tips slightly thinner so they do not visually shorten the nail further. Finish with topcoat, paying attention to the free edge for better durability and shine.
Pearl Heart Details
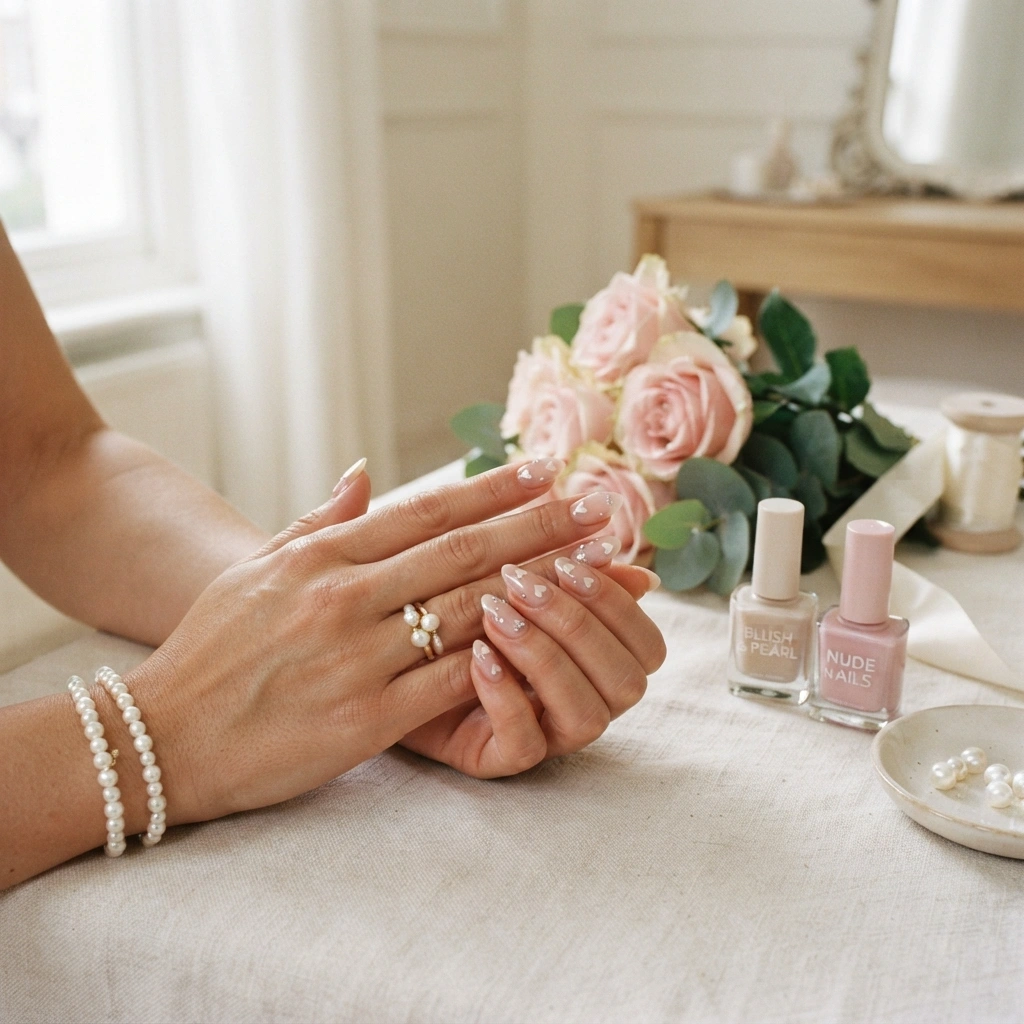
Want something romantic that feels especially elegant? Pearl-white hearts offer a softer alternative to traditional red nail art. Place tiny creamy-white hearts over a translucent blush or nude base, then finish with a glossy topcoat for a smooth, reflective surface. The subtle contrast creates an almost jewelry-like effect, especially when paired with pearl earrings or delicate gold accessories. This design works beautifully for dinners, weddings, date nights, and Valentine’s events because it feels celebratory without looking overly seasonal. It is also easy to adapt by using one accent nail instead of decorating every finger.
The secret to keeping pearl details visible is choosing a base with just enough color underneath. A very transparent nude allows the hearts to blend subtly, while a slightly rosier base gives them more definition. Use a fine detailing brush for small hearts and keep their size consistent. If you want added dimension, place a tiny pearl embellishment at the center of one heart, but avoid overloading the design. In my experience, one dimensional accent often looks more sophisticated than several. Seal everything carefully with topcoat, especially around embellishments, to create a smooth and lasting finish.
Blush Glitter Hearts
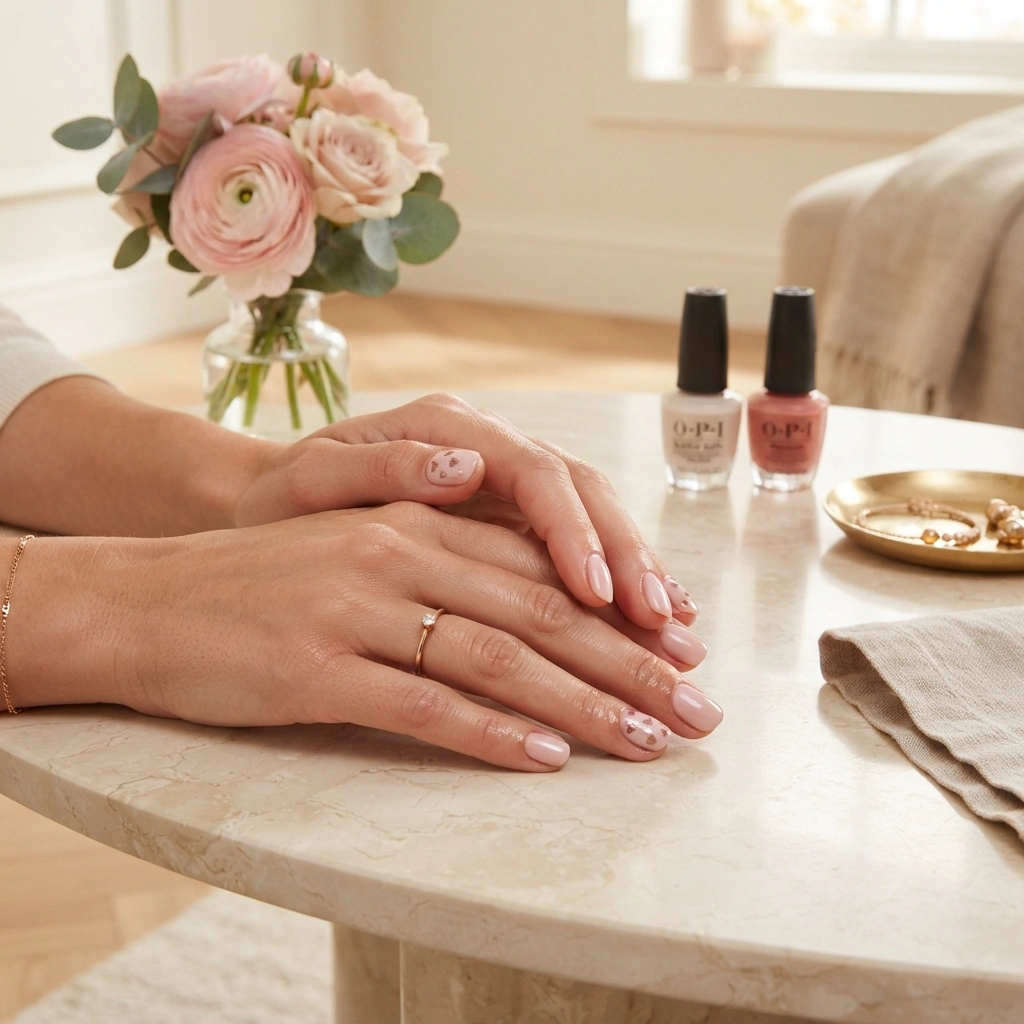
Add a little sparkle without turning your manicure into full glitter? Blush-pink nails with tiny rose-gold hearts create a delicate Valentine’s finish that catches the light beautifully. The soft base keeps the design wearable, while metallic hearts provide just enough shine for dinners, parties, or date nights. Short squoval nails work particularly well because their neat shape gives the small decorations a clean frame. If you prefer something quieter, place glitter hearts on only two accent nails. The combination feels festive while remaining polished enough for everyday outfits and accessories.
For a smoother application, choose a fine glitter polish or metallic nail-art paint instead of chunky glitter. Apply the blush base in thin layers and allow it to dry completely before creating the hearts. A small detailing brush provides better control for tiny shapes, while a dotting tool can help form the rounded upper sections. Keep the glitter concentrated in small areas so the manicure retains plenty of negative space. Once finished, apply a generous glossy topcoat to smooth the surface and enhance the metallic reflection. This simple step can make inexpensive nail art look much more refined.
Cupid Arrow Tips
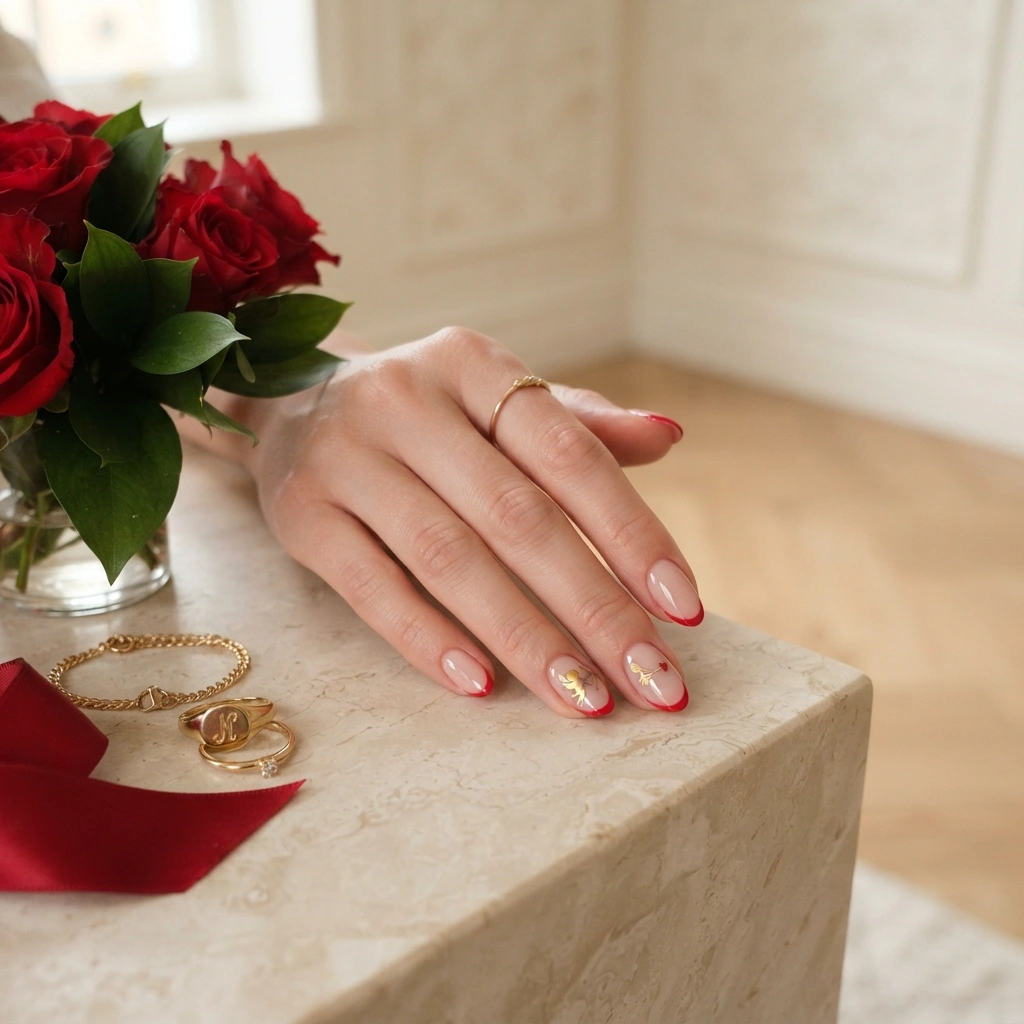
Give classic Valentine’s nail art a playful update with tiny cupid arrows. A sheer nude-pink base keeps the manicure clean, while thin red tips create a structured foundation. Add miniature arrows to one or two accent nails rather than decorating every finger. This keeps the artwork easy to appreciate without making the design feel crowded. The combination works particularly well on almond nails because their length provides enough room for thin lines and tiny arrowheads. It is a fun option when hearts feel too predictable but you still want an unmistakably romantic manicure.
Fine lines are the most important part of this design, so use a liner brush with only a small amount of polish. Draw the arrow shaft first, then add two tiny diagonal lines for the arrowhead. Let each line dry before adding another detail to prevent smearing. If your nails are short, simplify the design by painting only a small arrowhead or using one accent nail. A glossy topcoat will soften the overall appearance and protect the artwork. For a more sophisticated variation, replace bright red with burgundy or dusty rose.
Nude Heart Outline
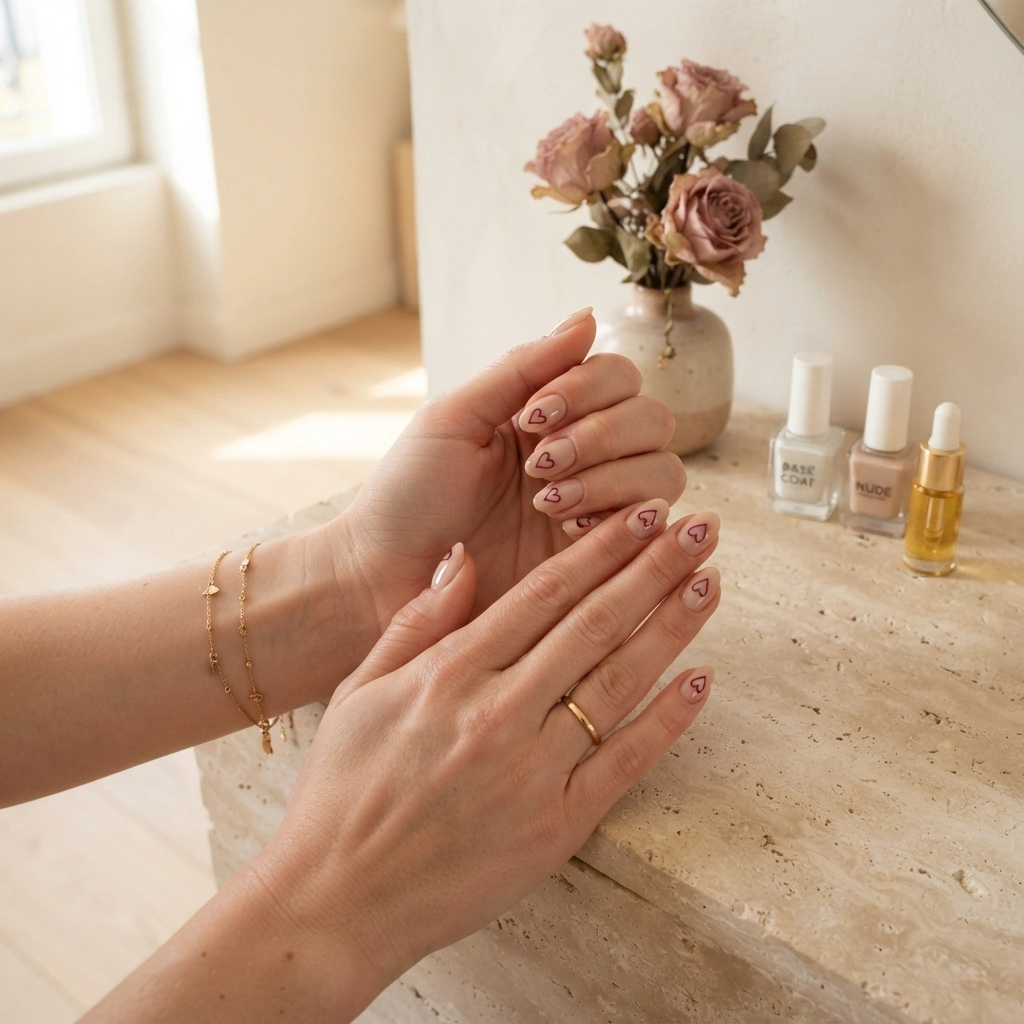
For a truly understated Valentine’s manicure, try delicate heart outlines over a neutral nude base. Instead of filling the hearts with color, use an ultra-thin burgundy, red, or dusty-rose line. The result is refined, modern, and easy to coordinate with almost any wardrobe. A glossy nude background allows the natural nail shape to remain visible, while the outlined hearts add just enough personality. This idea works beautifully for office settings, dinners, and everyday wear. It is also one of the easiest designs to adapt because the same concept looks polished on short, medium, oval, or almond nails.
A sheer nude polish is the foundation of this look, so choose a shade that complements your natural undertone. Once the base is dry, use a very fine liner brush to sketch each heart slowly. Keep the outlines delicate and avoid pressing too firmly, which can create uneven lines. If you are new to nail art, practice the heart shape on paper first. You can also place the outlines only on two or three nails for an even simpler version. Finish with glossy topcoat to smooth the surface and create the clean, understated appearance that makes this manicure so appealing.
Conclusion
The best Valentine’s manicure does not need dozens of decorations to make an impression. A tiny heart, soft pink base, elegant French tip, or rich burgundy accent can completely transform your nails while keeping the look comfortable and wearable. These simple valentines day nails offer plenty of inspiration for short, medium, almond, oval, and coffin shapes, so you can easily adapt your favorite idea.
Save this collection on Pinterest before your next manicure appointment, try the design that catches your eye, and share your favorite inspiration with someone who loves beautiful nail art. Small details can make a big difference, so choose your favorite colors, add your personal touch, and enjoy creating something special.
Read More : 22 Pink Valentine’s Day Nails Everyone Loves